SQL Database
Hosting

Our cloud solutions will let you manage your databases easier.
SQL Database Hosting
Advanced Scalability
With our SQL cloud databases, you can easily scale your resources up or down to meet your application's demands. This flexibility ensures optimal performance and cost-efficiency, regardless of workload fluctuations.
High Availability
Our SQL cloud databases are designed to ensure high availability and reliability. We make sure, your database is always online and accessible, thanks to our redundant infrastructure and automatic failover mechanisms.
Simplified Management
Managing your SQL databases is straightforward with Hostman's intuitive control panel. You can easily configure, monitor, and optimize your databases without needing extensive technical knowledge. Our platform handles routine maintenance tasks, so you don't have to.
Comprehensive Support
Enjoy 24/7 technical support with Hostman Cloud Database. Our dedicated support team is always available to assist you with any issues or questions, ensuring that your database operations run without interruptions.

SQL Databases for every purpose

Secure, scalable, and always online.

Redis

Accelerate with managed Redis. Blazing-fast data handling, zero management overhead — all in your control.

MySQL

Streamline app development with our fully managed MySQL environments, designed for optimal performance and scalability.

MongoDB

Flexible, dynamic MongoDB management lets you focus on innovation while we handle the data agility your app needs.

PostgreSQL

Unlock the power of PostgreSQL. We manage the details: you harness its advanced capabilities for your data-driven solutions.

RabbitMQ

Seamless messaging with RabbitMQ. Let us manage the queues while you build responsive, interconnected app features.

ClickHouse

Instant analytics with managed ClickHouse. Fast, reliable, and maintenance-free — query at the speed of thought.

Simple and predictable pricing

Choose a plan that fits your needs. Our flexible pricing ensures you only pay
for what you use.
MySQL
New York
1 x 3 GHz CPU
CPU
1 x 3 GHz
1 GB RAM
RAM
1 GB
20 GB NVMe
NVMe
20 GB
200 Mbps Bandwidth
Bandwidth
200 Mbps
$4
 /mo
2 x 3 GHz CPU
CPU
2 x 3 GHz
2 GB RAM
RAM
2 GB
60 GB NVMe
NVMe
60 GB
200 Mbps Bandwidth
Bandwidth
200 Mbps
$9
 /mo
2 x 3 GHz CPU
CPU
2 x 3 GHz
4 GB RAM
RAM
4 GB
80 GB NVMe
NVMe
80 GB
200 Mbps Bandwidth
Bandwidth
200 Mbps
$18
 /mo
4 x 3 GHz CPU
CPU
4 x 3 GHz
8 GB RAM
RAM
8 GB
160 GB NVMe
NVMe
160 GB
200 Mbps Bandwidth
Bandwidth
200 Mbps
$36
 /mo
6 x 3 GHz CPU
CPU
6 x 3 GHz
16 GB RAM
RAM
16 GB
320 GB NVMe
NVMe
320 GB
200 Mbps Bandwidth
Bandwidth
200 Mbps
$72
 /mo
8 x 3 GHz CPU
CPU
8 x 3 GHz
32 GB RAM
RAM
32 GB
640 GB NVMe
NVMe
640 GB
200 Mbps Bandwidth
Bandwidth
200 Mbps
$114
 /mo
16 x 3 GHz CPU
CPU
16 x 3 GHz
64 GB RAM
RAM
64 GB
1280 GB NVMe
NVMe
1280 GB
200 Mbps Bandwidth
Bandwidth
200 Mbps
$288
 /mo

One panel to rule them all

Easily control your database, pricing plan, and additional services
through the intuitive Hostman management console.
Easy set up and management
Ready-to-deploy cloud database solutions come pre-configured. Choose your setup, launch your database, and begin managing your data with ease.
Saves time and resources
Forget about configuring hardware and software or manual database management—our service has it all covered for you.
Security
Deploy databases on an isolated network to maintain private access solely through your own infrastructure.
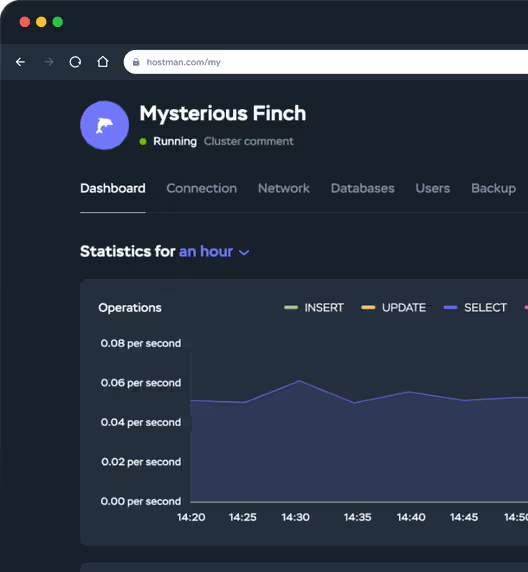
Hostman management console, statistics for an hour
Anup k.
Associate Cloud Engineer
5.0 out of 5

"Hostman Comprehensive Review of Simplicity and Potential"

It been few years that I have been working on Cloud and most of the cloud service...
Mansur H.
Security Researcher
5.0 out of 5

"A perfect fit for everything cloud services!"

Hostman's seemless integration, user-friendly interface and its robust features (backups, etc) makes it much easier...
Adedeji E.
DevOps Engineer
5.0 out of 5

"Superb User Experience"

For me, Hostman is exceptional because of it's flexibility and user-friendliness. The platform's ability to offer dedicated computing resources acr...
Yudhistira H.
Mid-Market(51-1000 emp.)
5.0 out of 5

"Streamlined Cloud Excellence!"

What I like best about Hostman is their exceptional speed of deployment, scalability, and robust security features. Their...
Mohammad Waqas S.
Biotechnologist and programmer
5.0 out of 5

"Seamless and easy to use Hosting Solution for Web Applications"

From the moment I signed up, the process has been seamless and straightforward...
Mohana R.
Senior Software Engineer
5.0 out of 5

"Availing Different DB Engine Services Provided by Hostman is Convenient for my Organization usecases"

Hostman manages the cloud operations...
Faizan A.
5.0 out of 5

"Hostman is a great fit for me"

Hostman is a great fit for me. What do you like best about Hostman? It was very easy to deploy my application and create database, I didn't have
Adam M.
5.0 out of 5

"Perfect website"

This website is extremely user friendly and easy to use. I had no problems so didn't have to contact customer support. Really good website and would recommend to others.
Anup K.
4.0 out of 5

"Simplifying Cloud Deployment with Strengths and Areas for Growth"

What I like best about Hostman is its unwavering commitment to simplicity...
Naila J.
5.0 out of 5

"Streamlined Deployment with Room for Improvement"

Hostman impresses with its user-friendly interface and seamless deployment process, simplifying web application hosting...

Start turning your ideas into solutions
with Hostman products and services

See all Products

Trusted by 500+ companies and developers worldwide

Global network of Hostman data centers

Select a place is close to you, close to your client,
or even across the world.
Hostmans' Locations
🇺🇸 San Francisco
🇺🇸 San Jose
🇺🇸 Texas
🇺🇸 New York
🇳🇱 Amsterdam
🇳🇬 Lagos
🇩🇪 Frankfurt
🇵🇱 Gdansk
🇦🇪 Dubai
🇸🇬 Singapore

Dive deeper into how to utilize our SQL databases

Debian

How to Install MySQL on Debian

Installing MySQL on Debian effectively creates a robust and flexible database (DB) infrastructure that accommodates a wide range of applications as well as services. It is renowned for its scalability, dependability, and durability. By setting it, individuals experience the operations in an efficient manner and enhance the overall efficiency of DB infrastructure. This combination is especially beneficial for administrators, DB analysts, and industries that demand a dependable database solution for dealing with huge data. Additionally, MySQL's comprehensive guide and supporters help make it simpler to troubleshoot problems and enhance operations.  In this guide, we will demonstrate the thorough procedure for installing and configuring MySQL on Debian. How to Install MySQL on Debian The default repositories do not contain the MySQL database server package on Debian. To install it on a  Linux system follow the below instructions. We will download the recent version of the MySQL. Step 1: Download MySQL Package Let us obtain the MySQL repository information package, which is in the .deb format: wget https://dev.mysql.com/get/mysql-apt-config_0.8.30-1_all.deb Note: To authenticate the most updated release, go to the MySQL repository webpage. Step 2: MySQL Configuration Package Installation Then, employ the .deb file for initializing the installation via dpkg: sudo dpkg -i mysql-apt-config_0.8.30-1_all.deb Respond to the prompt. For instance, pick MySQL Server & Cluster and hit Enter for starting configurations: For picking a version such as (mysql-8.4-lts), scroll downward and hit OK for the next step: Step 3: Refresh the System Now, update the server's package indexes to implement the updated MySQL info: sudo apt update Step 4: MySQL Installation Debian's default manager makes sure to install MySQL in an easier manner. Installing the package with this command: sudo apt install mysql-server -y You will see the interface for setting the root account. Input a stronger password to secure the database. In the end, hit the Ok button: Check the version on the server via the --version utility: mysql --version Step 5: Managing the Services Now, you can enable the MySQL service to initialize automatically at boot time: sudo systemctl enable mysql Activate the service via the systemctl utility: sudo systemctl start mysql Check if the system service is operational by viewing its status: sudo systemctl status mysql Step 6: MySQL Secure Installation The key or password that the individual created at the initialising procedure is currently protecting the root DB user on the server. MySQL also includes other insecure defaults, such as remote access to test databases and the root database user on the server.  It is vital to secure the MySQL installation after it has been completed as well as disable all unsafe default settings. There is a security script that can assist us in this procedure. Run the script: sudo mysql_secure_installation To activate the VALIDATE PASSWORD component and guarantee stringent password procedures, type Y and hit Enter. Next, you will need to configure several security settings: Set the Root Password: Select a strong password and make sure that it is correct. Configure the password policy for the DB server. For instance, type 2 to permit only the strong passwords on the server and hit Enter. When required to modify the root password, input N; alternatively, input Y to modify the password. Eliminate Anonymous Users: It is advised to eliminate the accessibility of anonymous users. For this, input Y and Enter when prompted. Prevent Accessibility of Remote Root: It is a better practice to avoid remote root login for multiple security concerns. To prevent the root user from having a remote access, input Y and hit Enter. Delete the Test DB: For enhancing security, the test database, which is utilized for testing, can be deleted. To do so, input Y and hit Enter. Refreshing Privilege Tables: It guarantees that all modifications are implemented instantly. To implement the configuration and edit the privileges table, hit Enter. Step 7: Access MySQL Utilizing the mysql client utility, MySQL establishes the connection and provides access to the database server console.  Now, access the shell interface and run general statements on the DB server. Let’s input the root and the password created at the time of the safe installation procedure: sudo mysql -u root -p Step 8: Basic MySQL Operations The creation of a DB and a new user for your applications rather than utilizing the root is a better practice. To accomplish the task, employ the given instructions: Create a Database: First, create a database. For instance, hostmandb is created via the below command: CREATE DATABASE hostmandb; Display All Databases: List all databases to make sure hostmandb is created: SHOW DATABASES; Create of a New User: Create a user and assign a strong password. In our example, we set Qwer@1234 as a password for the user  minhal. Replace these values with your data. CREATE USER 'minhal'@'localhost' IDENTIFIED BY 'Qwer@1234'; Give Permissions to the User: Give complete access to the hostmandb to the new user: GRANT ALL PRIVILEGES ON hostmandb.* TO 'minhal'@'localhost'; Flush Privileges: To implement the modifications, refresh the table: FLUSH PRIVILEGES; Exit the Shell: For closing the interface, utilize the EXIT statement: EXIT; Access MySQL Console as the Particular User For the purpose of testing hostmandb access, log in to MySQL as the new user, in our case minhal. sudo mysql -u minhal -p It accesses the console after entering the minhal user password when prompted: For verification, display all DBs and confirm that the hostmandb is available: SHOW DATABASES; Step 9: Configuration for Remote Access Setting up the server for supporting remote accessibility is necessary if an individual is required to access MySQL remotely. Follow these steps: Access the mysql.cnf file and modify the particular file for MySQL: sudo nano /etc/mysql/mysql.conf.d/mysqld.cnf Look for the line with the bind-address and change it to: bind-address = 0.0.0.0 Reload the MySQL service: sudo systemctl restart mysql Permit the user to have remote access: sudo mysql -u root -p GRANT ALL PRIVILEGES ON hostmandb.* TO 'minhal'@'localhost';FLUSH PRIVILEGES;EXIT; Step 10: Firewall Configuration If you have a firewall activated, you need to open the MySQL port 3306 to traffic. Set up the firewall following the below steps: Allow traffic through MySQL: sudo ufw allow mysql Now, activate the UFW on the system: sudo ufw enable Reload the firewall: sudo ufw reload Step 11: Restore and Backup Maintaining regular backups is crucial to avoiding data loss. The mysqldump utility is provided by MySQL for backup creation. To achieve this, consider these instructions: Backup a Single Database: This command employs mysqldump to create the backup of the hostmandb as a hostmandb_backup.sql file: sudo mysqldump -u root -p hostmandb> hostmandb_backup.sql Backup All Databases: For creating a backup of all databases as a file named all_databases_backup.sql with root privileges, utilize mysqldump: sudo mysqldump -u root -p --all-databases > all_databases_backup.sql Restore a Particular Database: Now, restore the hostmandb from the backup file hostmandb_backup.sql: sudo mysql -u root -p hostmandb < hostmandb_backup.sql Step 12: Optimize MySQL Operations (Optional) Depending on the workload and server resources, you can adjust settings to guarantee peak performance. These instructions will help you maximize MySQL's speed: Adjust InnoDB Buffer Pool Size: Caches for data and indexes are kept in the InnoDB buffer pool. Expanding its size can enhance its functionality. Edit the MySQL configuration file: sudo nano /etc/mysql/mysql.conf.d/mysqld.cnf The below line should be added or changed: innodb_buffer_pool_size = 1G Its size should be adjusted according to the amount of memory on the server. Enable Query Cache: The query cache stores the outcome of SELECT queries. Enabling it can enhance operations for repetitive queries. Modify the .cnf file: sudo nano /etc/mysql/mysql.conf.d/mysqld.cnf Add or edit the below lines: query_cache_type = 1query_cache_size = 64M Optimize Table Structure: Frequently optimize your customers table in hostmandb to recover wasted space and boost efficiency: USE hostmandb;OPTIMIZE TABLE customers; Analyze Operations: DB operations can be tracked and analyzed with tools like MySQL Workbench and mysqltuner. Using the command below, install mysqltuner: sudo apt install mysqltuner Run mysqltuner to get performance recommendations: sudo mysqltuner Conclusion Installing a MySQL environment is important in today's digital world. By following this instruction, you'll be able to safely install and connect to your MySQL database. This strategy not only increases security but also improves remote database maintenance efficiency. It helps to prevent breaches and ensures the confidentiality of your data. This article has given thorough instructions for the installation of MySQL's database environment on Debian. It is suggested that MySQL servers should be regularly monitored and optimized to guarantee optimum performance and dependability. In addition, Hostman offers pre-configured and ready-to-use cloud databases, including cloud MySQL. 
14 January 2025 · 8 min to read
MySQL

Creating an SSH Tunnel for MySQL Remote Access

Maintaining a secure database environment is vital in today's digital age. It helps prevent breaches and ensure the confidentiality of your information. A highly effective process for enhancing MySQL connection security is by implementing an SSH tunnel for remote access. This approach establishes an encrypted tunnel between your device and the server, ensuring data remains secure. SSH Tunneling SSH tunneling, also referred to as SSH port forwarding, enables the secure transmission of data between networks. By establishing an encrypted SSH tunnel, data can be safely transferred without the risk of exposure to potential threats. It possesses several benefits: Security: Encrypts data, keeping it safe from being seen or intercepted by others. Bypassing Restrictions: Allows access to services and resources blocked by firewalls. Flexibility: Can handle all network traffic types, fitting many uses. Types of SSH Tunneling SSH tunneling is of three types: Local Port Forwarding: It lets you redirect a port from your local machine to a destination machine using a tunnel. This is the method used in our guide. For example: ssh -L 3307:localhost:3306 your_username@your_server_ip Remote Port Forwarding: It lets you redirect a port from a remote machine to your local machine. This is useful for accessing local services from a remote machine. For example: ssh -R 9090:localhost:80 your_username@your_server_ip Dynamic Port Forwarding: It lets you create a SOCKS proxy to dynamically forward traffic through an SSH tunnel. This is useful for secure web browsing or bypassing firewalls. For example: ssh -R 9090:localhost:80 your_username@your_server_ip Prerequisites Before beginning, ensure you have: SSH client (OpenSSH, or PuTTY for Windows) MySQL server info SSH into the MySQL host machine securely. Setting Up Remote Access Go through these essential steps to securely set up remote access to your MySQL server through SSH tunnel: Step 1: Facilitate Connectivity For remote access, tune it to listen on an external IP. This allows SQL access from localhost to all IPs. Here’s how to do it: Access MySQL Config File Using a text editor, access the config file. On Ubuntu, it's typically located at: sudo nano /etc/mysql/mysql.conf.d/mysqld.cnf If the file isn't in its expected place, search for it with: sudo find / -name mysqld.cnf Edit bind-address Inside the file, find bind-address line, which is set to 127.0.0.1 by default, limiting server to local connections: Change the address to allow connections from all IP addresses by setting it to 0.0.0.0. Save changes by pressing Ctrl+X, Y to confirm, and Enter to exit. Restart MySQL Restart service to apply the updated settings: sudo systemctl restart mysql Step 2: Adjust Firewall By default, 3306 is the standard port in MySQL. To permit remote access, ensure this port is opened in your firewall settings. Tailor these steps to your specific firewall service. Open Port via UFW On Ubuntu, UFW is a pre-installed firewall utility. To allow traffic on 3306: sudo ufw allow from remote_ip to any port 3306 Substitute remote_ip with actual IP. Open Port via Firewalld On Red Hat-based and Fedora systems, Firewalld is the primary firewall tool. To open port 3306 for traffic, run these commands: sudo firewall-cmd --zone=public --add-service=mysql --permanentsudo firewall-cmd --reload The first command permanently allows MySQL traffic, and the second reloads the firewall to make the changes. Step 3: Open Your SSH Client Fire up your go-to SSH client. Opt for PuTTY on Windows, or the terminal if using macOS or Linux. Using Terminal (Linux or macOS) Implement this command: ssh -L 3307:localhost:3306 your_username@your_server_ip 3307: It's the local port your computer will listen to. localhost: It's a MySQL server address used by the SSH. It's where the service runs on the machine you're connecting to. 3306: The remote port where the server listens for incoming connections. username@server_ip: Your SSH login details. When required, verify the server's fingerprint. Confirm it matches by typing "yes" and pressing Enter.  Once confirmed, enter your SSH password if asked and press Enter for tunneling. After the tunnel is up, all traffic destined to local port 3307 will be forwarded to the remote machine in a secure fashion. Using PuTTY (Windows) Windows users can use the below-given instructions to perform tunneling: Launch PuTTY. From the left menu, direct to Connection > SSH > Tunnels. Input 3307 for Source port and localhost:3306 for the Destination field. Then hit Add. Navigate back to Session menu, enter server’s IP address and start the session using the Open button. Step 4: Connect to MySQL After setting up the tunnel, seamlessly link to the server through: sudo mysql -h localhost -P 3307 -u your_mysql_user -p Step 5: Verify the Connection Log into server and check if you can run queries: Additional Safeguards for Enhanced Security To further enhance the MySQL remote access security, consider the following: Implement Robust Passwords and Authentication Ensure using strong, unique passwords for both servers accounts. Implement key-based SSH authentication for added security. Here's how to set up SSH key authentication: Generate an SSH key pair via: ssh-keygen -t rsa -b 4096 -C "[email protected]" Copy the public key to the server via: ssh-copy-id your_username@your_server_ip Regularly Update Your Software Ensure that your server, client, and all associated software are consistently updated with the latest security patches and enhancements. This practice safeguards your system against known vulnerabilities and potential threats. Supervise and Audit Access Consistently examine access logs on both your MySQL and SSH server. Watch for any unusual activities or unauthorized attempts to gain access. Set up logging for both services: Check the SSH logs via: sudo tail /var/log/auth.log Enable and check MySQL logs by adding the below-given lines in the configuration file: [mysqld]general_log = 1general_log_file = /var/log/mysql/mysql-general.log You can view the general query log via: sudo cat /var/log/mysql/mysql-general.log To continuously monitor the log file in real time, use: sudo tail -f /var/log/mysql/mysql-general.log Implement IP Whitelisting Limit access to your MySQL by applying IP whitelisting. It ensures that connections are permitted only from specified IP addresses, thereby enhancing security: sudo ufw allow from your_trusted_ip to any port 3306 Replace your_trusted_ip with the IP address you trust. Troubleshooting Issues Here are a few common problems and solutions: Unable to Connect: Check SSH configuration and firewall rules. Ensure the SSH tunnel is correctly established and the server is reachable. Port Already in Use: Change the local forwarding port from 3307 to another available port. Authentication Errors: Verify your server's credentials. Ensure that the correct user permissions are set. MySQL Server Not Listening on Correct IP: Double-check the MySQL bind-address configuration and ensure the server is listening on the correct IP. Conclusion By adhering to this guide, you'll securely connect to your MySQL database via an SSH tunnel. This method not only boosts security but also enhances remote database management efficiency.  Regularly check your SSH tunnel setup to ensure a stable, secure connection. This practice ensures your data stays protected, providing peace of mind for seamless database operations. Hostman provides pre-configured and ready-to-use cloud databases, including cloud MySQL.
27 December 2024 · 6 min to read
MySQL

How To Use Triggers in MySQL

SQL triggers are a vital component of many database systems, allowing automated execution of specific actions when predefined events occur. Triggers act as responsive mechanisms within a database, ensuring consistency and enabling automation of repetitive tasks. These event-driven procedures are particularly effective for handling operations triggered by changes such as  INSERT,  UPDATE, or DELETE in a table. By using triggers, database administrators and developers can enforce rules, maintain logs, or even invoke complex processes with minimal manual intervention. Let’s begin by defining an example database for a small online store to understand how triggers work in practice: -- Let’s create a databse called SHOP ; CREATE DATABASE SHOP ; USE SHOP ; -- Now we create the Products table CREATE TABLE Products ( ProductID INT PRIMARY KEY, ProductName VARCHAR(100), Stock INT, Price DECIMAL(10, 2) ); -- Then the StockAudit table CREATE TABLE StockAudit ( AuditID INT AUTO_INCREMENT PRIMARY KEY, ProductID INT, ChangeType VARCHAR(10), QuantityChanged INT, ChangeTimestamp TIMESTAMP DEFAULT CURRENT_TIMESTAMP ); Classification of SQL Triggers SQL triggers can be classified based on their scope and timing. Row-level triggers are executed once for every row affected by a database operation, making them adequate for detailed tracking of data changes. For example, when updating inventory quantities for multiple products, a row-level trigger can record changes for each product individually. Conversely, statement-level triggers run once for an entire operation, regardless of how many rows are affected. These are useful for performing global checks or logging summary information. Triggers can also be categorized by their execution timing relative to the triggering event. Before triggers are executed prior to the event, often to validate or modify data before it is written to the database. After triggers execute after the event, making them ideal for tasks such as auditing or enforcing referential integrity. This is an example of a row-level AFTER INSERT trigger which logs new product additions: -- The DELIMITER command is used to change the statement delimiter from ; to // while defining the trigger DELIMITER // CREATE TRIGGER LogNewProduct AFTER INSERT ON Products FOR EACH ROW BEGIN INSERT INTO StockAudit (ProductID, ChangeType, QuantityChanged) VALUES (NEW.ProductID, 'ADD', NEW.Stock); END; // DELIMITER ; How Triggers Operate in a Database Triggers are defined by specifying the event they respond to, the table they act upon, and the SQL statements they execute. When a trigger’s event occurs, the database automatically invokes it, running the associated logic seamlessly. This behavior eliminates the necessity for external application code to maintain consistency. For instance, consider a scenario where we need to prevent negative stock levels in our inventory. We can achieve this with a BEFORE UPDATE trigger that validates the updated stock value: DELIMITER // -- Trigger to prevent negative stock values CREATE TRIGGER PreventNegativeStock BEFORE UPDATE ON Products FOR EACH ROW BEGIN -- Check if the new stock value is less than 0 IF NEW.Stock < 0 THEN -- Raise an error if the stock value is negative SIGNAL SQLSTATE '45000' SET MESSAGE_TEXT = 'Stock cannot be negative'; END IF; END; // DELIMITER ; This guarantees that no changes violating the business rules are applied to the database. Practical Advantages of Using Triggers Triggers offer numerous advantages, such as enforcing business logic directly within the database layer. This ensures that data integrity is preserved across all applications accessing the database, reducing the need for repetitive coding. By centralizing critical logic, triggers simplify maintenance and enhance consistency. For example, a trigger can automate logging of stock adjustments, saving developers from implementing this functionality in multiple application layers. Consider this AFTER UPDATE trigger: DELIMITER // -- Trigger to log stock adjustments after an update on the Products table CREATE TRIGGER LogStockAdjustment AFTER UPDATE ON Products FOR EACH ROW BEGIN -- Insert a record into the StockAudit table with the product ID, change type, and quantity changed INSERT INTO StockAudit (ProductID, ChangeType, QuantityChanged) VALUES (OLD.ProductID, 'ADJUST', NEW.Stock - OLD.Stock); END; // DELIMITER ; This trigger automatically records every stock change, streamlining audit processes and ensuring compliance. Challenges and Considerations While triggers are powerful, they are not without challenges. Debugging triggers can be tricky since they operate at the database level and their effects may not be immediately visible. For example, a misconfigured trigger might inadvertently cause cascading changes or conflicts with other triggers, complicating issue resolution. Performance is another critical consideration. Triggers that are not well designed can slow down database operations, especially if they include resource-intensive logic or are triggered frequently. For instance, a trigger performing complex calculations on large datasets can bottleneck critical operations like order processing or stock updates. To mitigate these challenges, it is advisable to: Keep trigger logic concise and efficient. Use triggers sparingly and only for tasks best handled within the database. Test triggers extensively in controlled environments before deployment. Real-World Example: Cascading Triggers Cascading triggers can ensure data integrity across related tables. Consider a database with Orders and OrderDetails tables. When an order is deleted, it is essential to remove all associated details: DELIMITER // -- Trigger to cascade delete order details after a delete on the Orders table CREATE TRIGGER CascadeDeleteOrderDetails AFTER DELETE ON Orders FOR EACH ROW BEGIN -- Delete the corresponding records from the OrderDetails table DELETE FROM OrderDetails WHERE OrderID = OLD.OrderID; END; // DELIMITER ; This ensures that orphaned records are automatically removed, maintaining database consistency without manual intervention. However, cascading triggers require careful documentation to avoid unintended interactions. Optimizing Trigger Performance To prevent performance bottlenecks, triggers should handle minimal logic and avoid intensive operations. For tasks requiring significant processing, consider using scheduled jobs or batch processes instead. For example, instead of recalculating inventory levels on every update, a nightly job could summarize stock levels for reporting purposes. Here’s a simplified trigger that avoids complex calculations: DELIMITER // -- Trigger to log stock changes after an update on the Products table CREATE TRIGGER SimpleStockLog AFTER UPDATE ON Products FOR EACH ROW BEGIN -- Check if the new stock value is different from the old stock value IF NEW.Stock <> OLD.Stock THEN -- Insert a record into the StockAudit table with the product ID, change type, and quantity changed INSERT INTO StockAudit (ProductID, ChangeType, QuantityChanged) VALUES (NEW.ProductID, 'UPDATE', NEW.Stock - OLD.Stock); END IF; END; // DELIMITER ; Conditional Logic and Business Rules Conditional logic within triggers enables dynamic enforcement of business rules. For example, a trigger can adjust discounts based on stock availability: DELIMITER // -- Trigger to adjust discount based on stock levels after an update on the Products table TRIGGER AdjustDiscount AFTER UPDATE ON Products FOR EACH ROW BEGIN -- Check if the new stock value is greater than 100 IF NEW.Stock > 100 THEN -- Set the discount to 10 if the stock is greater than 100 UPDATE Products SET Discount = 10 WHERE ProductID = NEW.ProductID; ELSE -- Set the discount to 0 if the stock is 100 or less UPDATE Products SET Discount = 0 WHERE ProductID = NEW.ProductID; END IF; END; // DELIMITER ; This dynamic adjustment ensures that promotions align with inventory levels. Conclusion SQL triggers are indispensable for automating tasks, enforcing rules, and maintaining data integrity within a database. While they offer significant benefits, their design and implementation require careful consideration to avoid performance issues and unintended consequences. By adhering to best practices, such as keeping triggers simple, testing thoroughly, and documenting dependencies, developers can harness their full potential. Properly implemented triggers can elevate database management, making operations more efficient and reliable. Hostman provides pre-configured and ready-to-use cloud databases, including cloud MySQL.
24 December 2024 · 7 min to read
MySQL

The UPDATE Command: How to Modify Records in a MySQL Table

Updating data in databases is a critical task when working with MySQL. It involves modifying the values of existing records in a table. Updates can range from modifying fields in a group of rows (or even all rows in a table) to adjusting a specific field in a single row. Understanding the syntax for updating data is essential for effectively working with both local and cloud databases. The key command for modifying records in a MySQL database table is UPDATE. Updates occur sequentially, from the first row to the last. Depending on the type of update, there are two syntax options for the UPDATE statement in MySQL. Syntax for Updating a Single Table UPDATE [LOW_PRIORITY] [IGNORE] table_reference SET assignment_list WHERE where_condition ORDER BY ... LIMIT row_count; Parameters: Required: SET assignment_list: Specifies which columns to modify and how (assignment_list is the list of columns and their new values). Optional: LOW_PRIORITY: If specified, the UPDATE is delayed until no other user is reading data from the table. IGNORE: Ensures the UPDATE continues even if errors occur. Rows with duplicate values in unique key columns are not updated. WHERE where_condition: Specifies the conditions for selecting rows to update. If omitted, all rows in the table will be updated. ORDER BY: Determines the order in which rows are updated. LIMIT row_count: Limits the number of rows updated (row_count specifies the number of rows). This count applies to rows matching the WHERE condition, regardless of whether they are actually modified. Syntax for Updating Multiple Tables UPDATE [LOW_PRIORITY] [IGNORE] table_references SET assignment_list WHERE where_condition; Parameters: table_references: Specifies the tables to update. Changes are applied as defined in assignment_list. ORDER BY and LIMIT are not allowed when updating multiple tables. Other optional parameters (LOW_PRIORITY, IGNORE, WHERE) behave the same as for a single-table update. Note that when updating multiple tables, there is no guarantee that updates will occur in a specific order. Creating a Test Database Let’s create a database for a bookstore that sells rare and antique books from around the world. The table will have four tables: author, genre, book, and sales. CREATE TABLE author ( id INT PRIMARY KEY AUTO_INCREMENT, author_name VARCHAR(50) NOT NULL ); INSERT INTO author (author_name) VALUES ('Leo Tolstoy'), ('Franz Kafka'), ('Nikolai Gogol'), ('William Shakespeare'), ('Homer'); CREATE TABLE genre ( id INT PRIMARY KEY AUTO_INCREMENT, genre_name VARCHAR(30) NOT NULL ); INSERT INTO genre (genre_name) VALUES ('Realist novel'), ('Dystopian novel'), ('Picaresque novel'), ('Epic poetry'); CREATE TABLE book ( book_id INT PRIMARY KEY AUTO_INCREMENT, title VARCHAR(50), author_id INT NOT NULL, genre_id INT, price DECIMAL(8,2) NOT NULL, amount INT DEFAULT 0, FOREIGN KEY (author_id) REFERENCES author (id), FOREIGN KEY (genre_id) REFERENCES genre (id) ); INSERT INTO book (title, author_id, genre_id, price, amount) VALUES ('Anna Karenina', 1, 1, 650.00, 15), ('The Castle', 2, 2, 570.20, 6), ('Dead Souls', 3, 3, 480.00, 2), ('Iliad', 5, 4, 518.99, 4), ('Odyssey', 5, 4, 518.99, 7); CREATE TABLE sales ( id INT PRIMARY KEY AUTO_INCREMENT, book_id INT NOT NULL, count INT NOT NULL, cost DECIMAL(8,2) NOT NULL, FOREIGN KEY (book_id) REFERENCES book (book_id) ); We will get the following tables. Table: book Here, we have the columns: book_id: Unique book identifier. title: The book's title. author_id: Author identifier (foreign key to author). genre_id: Genre identifier (foreign key to genre). price: Price of the book per unit. amount: Number of books in stock. The genre table will have the following content:  id genre_name 1 Realist novel 2 Dystopian novel 3 Picaresque novel 4 Epic poetry And our author table will look like this: id author_name 1 Leo Tolstoy 2 Franz Kafka 3 Nikolai Gogol 4 William Shakespeare 5 Homer Table: sales The columns here are: id: Unique identifier for the transaction. book_id: Unique book identifier (foreign key to book). count: Number of books sold. cost: Total cost of the purchased books. Data Update Operations Now, having created a sample database, we will demonstrate the execution of various data update operations using the UPDATE statement and other commands in MySQL. 1. Updating All Rows If we omit the WHERE clause in an UPDATE statement, all rows in the table will be updated. For example, suppose there is a promotion in a bookstore where all books are priced at a fixed rate of 500. The query would look like this: UPDATE bookSET price = 500; Resulting Table: If we try to assign a value that is already in a column, MySQL will not update it. If we want to assign a NULL value to a column defined as NOT NULL will, the query will return an error:  Column 'name_column' cannot be null Using the IGNORE parameter forces the value to default: 0 for numeric types, "" for string types, default dates (e.g., 0000 for YEAR, 0000-00-00 00:00:00 for DATETIME). 2. Updating Rows with a Condition Updating all rows is rare; typically, updates are performed based on specific conditions. For instance, to apply a discount on books with fewer than 5 copies in stock: UPDATE book SET price = 300WHERE amount < 5; Resulting Table: 3. Updating Values Using Expressions Columns can be updated using expressions instead of static values. For example, we can apply a 15% discount on Russian classics (author IDs 1 and 3): UPDATE book SET price = price * 0.85WHERE author_id IN (1, 3); Resulting Table: Updates are executed from left to right. For example, the query below increments the amount by 1 and then doubles it: UPDATE book SET amount = amount + 1, amount = amount * 2; Resulting Table: 4. Updating with DEFAULT We can update column values to their default values (DEFAULT), which are defined during the creation or modification of the table. To find out the default values used in our table, we can execute the following query: DESC book; Table Structure: Next, we reset the values of the amount column to its default value. Since the default value for amount is 0, all rows will now have amount set to 0: UPDATE book SET amount = DEFAULT; Resulting Table: 5. Updating Multiple Columns We can update multiple columns in a single query. For example, let's change the price and amount values for rows where book_id < 4: UPDATE book SET price = price * 0.9, amount = amount - 1 WHERE book_id < 4; Resulting Table: 6. Using LIMIT The LIMIT clause allows us to restrict the number of rows to be updated. For instance, we update only the first row where genre_id = 4: UPDATE book SET price = 100 WHERE genre_id = 4 LIMIT 1; The table contains two rows with genre_id equal to 4, but since we specified LIMIT 1, only one will be updated. Resulting Table: Note: The LIMIT N parameter does not guarantee that exactly N rows will be updated—it processes the first N rows matching the WHERE condition, regardless of whether the rows are updated or not. 7. Updating Multiple Tables In MySQL, it is possible to update multiple tables simultaneously. For example, update the amount in the book table and set the author_name to "-" in the author table for specific conditions: UPDATE book, author SET amount = amount + 3, author.author_name = '-' WHERE book.book_id = 4 AND author.id = 4; Resulting book Table: While the author table will look like this: id author_name 1 Leo Tolstoy 2 Franz Kafka 3 Nikolai Gogol 4 William Shakespeare 5 Homer 8. Updating Tables with a Join (INNER JOIN) While performing updates, we can also join tables using the INNER JOIN command. UPDATE book b INNER JOIN author a ON b.author_id = a.idSET b.title = CONCAT(b.title, ' (', a.author_name,')'); Specifying INNER is not mandatory, as this type of join is used by default. We can rewrite the query as follows and get the same result: UPDATE book, author a SET b.title = CONCAT(b.title, ' (', a.author_name,')')WHERE b.author_id = a.id; 9. Updating Tables with a Join (LEFT JOIN) We can also use a LEFT JOIN. In this case, we must specify LEFT JOIN in the query.  For example, we can update the stock quantity of books after a purchase. Let's add two rows to the sales table: INSERT INTO sales (book_id, count, cost) VALUES (1, 3, (SELECT price FROM book WHERE book_id = 1)*3), (3, 1, (SELECT price FROM book WHERE book_id = 3)*1); The store sold 3 copies of 'Anna Karenina' and 1 copy of 'Dead Souls'. Let's execute the query: UPDATE book LEFT JOIN sales on book.book_id = sales.book_idSET amount = amount - countWHERE sales.book_id is not NULL; We can see that now we have less copies of these books: If we try not to use LEFT JOIN, we will encounter the error: Out of range value for column 'amount' at row 3 This happens because amount cannot be negative. Alternatively, if we add IGNORE, the result will be: As we can see, we reduced the quantity in all rows by three books, which is not what we wanted. 10. Updating with CASE, IF, IFNULL, COALESCE When updating a table, it is also possible to use conditional operators such as CASE, IF, and others.The CASE function evaluates a set of conditions and, depending on the result, returns one of the possible outcomes. The syntax for using CASE and WHEN in an UPDATE statement in MySQL is as follows: UPDATE book SET price = CASE genre_id WHEN 1 THEN 100 WHEN 2 THEN 150 ELSE price END; In this case, if the book has genre 1, we set the price to 100, and if the genre is 2, the price is set to 150. The IF function returns one of two values depending on the result of a conditional expression. If the book has genre 4, we decrease its price by 200; otherwise, we leave the price unchanged. UPDATE bookSET price = IF (genre_id = 4, price-200, price); The result: The IFNULL function checks the value of an expression – if it is NULL, a specified value is returned; otherwise, the expression itself is returned. Let's assume that one of the amount values is NULL: Let's check all the values in the amount column, and if any NULL values are found, we will replace them with 0: UPDATE bookSET amount = IFNULL(amount, 0); Resulting Table: The COALESCE function is quite similar to IFNULL. The main difference is that this function can accept multiple values (two or more). Like IFNULL, it returns the first value that is not NULL. To see how this works, let's create a table like this: id col1 col2 col3 col4 1   val12 val13 val14 2     val23 val24 3       val34 And run the query: UPDATE test_tableSET col4 = COALESCE(col1, col2, col3, 'no value'); We will get: id col1 col2 col3 col4 1   val12 val13 val12 2     val23 val23 3       no value 11. Updating with Sorting Sorting can help when updating a field with a unique key. If we want to shift our id values by 1, updating the first row would result in two rows having id = 2, which will cause an error. However, if we add ORDER BY and start updating from the end, the query will execute successfully: UPDATE bookSET book_id=book_id+1  We will get: 12. Updating Based on Data from Other Tables In MySQL, when working with UPDATE, it is possible to use nested SELECT and FROM commands in the WHERE condition. In the following example, we first retrieve the id of the 'Epic poetry' genre, then use the retrieved value to select the rows for updating the table. UPDATE book SET amount = 0 WHERE genre_id = ( SELECT id FROM genre Where genre_name = 'Epic poetry' ); Alternatively, we can select the values that need to be changed using the query: UPDATE book SET price = ( SELECT MIN (cost) FROM sales) WHERE amount < 5; We are updating the price values of all books whose stock quantity is less than 5, setting the price to the minimum selling amount. The minimum selling amount is 480: It is not possible to update the table by selecting values from the same table in a subquery. However, there is a trick we can use – we can join the table with itself: UPDATE book AS book_1 INNER JOIN( SELECT genre_id, MIN(amount) AS min_amount FROM book GROUP BY genre_id ) AS book_2 ON book_1.genre_id = book_2.genre_id SET book_1.amount = book_2.min_amount; In this case, the subquery creates a temporary table for the join and closes it before the UPDATE begins execution. The subquery finds the minimum quantity of books for each genre, which is then used to update the amount column. In our table, only genre 4 has more than one row. The values in both rows should be replaced with the minimum value for that genre, which is 4. We will get: Another option is using SELECT FROM SELECT: UPDATE book AS book_1 SET book_1.price = (SELECT MIN(price) AS min_price FROM ( SELECT price FROM book) as book_2); In this case, a temporary table is also created. However, only a single value is assigned to all rows. Conclusion We have covered the features of using the UPDATE statement in MySQL in as much detail as possible and covered simple scenarios with practical examples.
12 December 2024 · 11 min to read
MySQL

How to Find and Delete Duplicate Rows in MySQL with GROUP BY and HAVING Clauses

Duplicate entries may inadvertently accumulate in databases, which are crucial for storing vast amounts of structured data. These duplicates could show up for a number of reasons, including system errors, data migration mistakes, or repeated user submissions. A database with duplicate entries may experience irregularities, sluggish performance, and erroneous reporting. Using the GROUP BY and HAVING clauses, as well as a different strategy that makes use of temporary tables, we will discuss two efficient methods for locating and removing duplicate rows in MySQL. With these techniques, you can be sure that your data will always be accurate, clean, and well-organized. Database duplication in MySQL tables can clog your data, resulting in inaccurate analytics and needless storage. Locating and eliminating them is a crucial database upkeep task. This is a detailed guide on how to identify and remove duplicate rows. If two or more columns in a row have identical values, it is called a duplicate row. For instance, rows that have the same values in both the userName and userEmail columns of a userDetails table may be considered duplicates. Benefits of Removing Duplicate Data The advantage of eliminating duplicate data is that duplicate entries can slow down query performance, take up extra storage space, and produce misleading results in reports and analytics. The accuracy and speed of data processing are improved by keeping databases clean, which is particularly crucial for databases that are used for critical applications or are expanding. Requirements Prior to starting, make sure you have access to a MySQL database or have MySQL installed on your computer. The fundamentals of general database concepts and SQL queries. One can execute SQL commands by having access to a MySQL client or command-line interface. To gain practical experience, you can create a sample database and table that contains duplicate records so that you can test and comprehend the techniques for eliminating them. Creating a Test Database Launch the MySQL command-line tool to create a Test Database. mysql -u your_username -p Create a new database called test_dev_db after entering your MySQL credentials. CREATE DATABASE test_dev_db; Then, switch to this newly created database:. USE test_dev_db; Add several rows, including duplicates, to the userDetails table after creating it with the CREATE TABLE query and INSERT query below. CREATE TABLE userDetails ( userId INT AUTO_INCREMENT PRIMARY KEY, userName VARCHAR(100), userEmail VARCHAR(100) ); INSERT INTO userDetails (userName, userEmail) VALUES (‘Alisha’, ‘[email protected]’), (‘Bobita, ‘[email protected]’), (‘Alisha’, ‘[email protected]’), (‘Alisha’, ‘[email protected]’); Using GROUP BY and HAVING to Locate Duplicates Grouping rows according to duplicate-defining columns and using HAVING to filter groups with more than one record is the simplest method for finding duplicates. Now that you have duplicate data, you can use SQL to determine which rows contain duplicate entries. MySQL's GROUP BY and HAVING clauses make this process easier by enabling you to count instances of each distinct value. An example of a table structure is the userDetails table, which contains the columns userId, userName, and userEmail. The GROUP BY clause is useful for counting occurrences and identifying duplicates because it groups records according to specified column values. The HAVING clause  allows duplicate entries in groups formed by GROUP BY to be found by combining groups based on specific criteria. Table userDetails Structure userId userName userEmail 1 Alisha  [email protected] 2 Bobita  [email protected] 3 Alisha  [email protected] 4 Alisha  [email protected] In the above table userDetails, records with identical userName and userEmail values are considered duplicates. Finding Duplicates Query for find the duplicate entries: SELECT userName, userEmail, COUNT(*) as count FROM userDetails GROUP BY userName, userEmail HAVING count > 1; Rows are grouped by userName and userEmail in the aforementioned query, which also counts entries within the group and eliminates groups with a single entry (no duplicates). Explanation: SELECT userName, userEmail, COUNT(*) as count: Retrieves the count of each combination of username and userEmail, as well as their unique values. GROUP BY userName, userEmail: Records are grouped by username and user email using the GROUP BY userName, userEmail function COUNT (*): Tallies the rows in each set. HAVING occurrences > 1: Recurring entries are identified by displaying only groups with more than one record. This query will return groups of duplicate records based on the selected columns. userName userEmail count Alisha [email protected] 3 Eliminating Duplicate Rows After finding duplicates, you may need to eliminate some records while keeping the unique ones. Joining the table to itself and removing rows with higher userId values is one effective method that preserves the lowest userId for every duplicate. Use the SQL query to remove duplicate rows while keeping the lowest userId entry. DELETE u1 FROM userDetails u1 JOIN userDetails u2 ON u1. userName = u2. userName AND u1. userEmail = u2. userEmail AND u1. userId > u2. userId ; Explanation: u1 & u2: Aliases for the userDetails table to ease a self-join. ON u1. userName = u2. userName AND u1. userEmail = u2. userEmail: Matches rows with identical userName, userEmail. AND u1. userId > u2. userId: Removes rows with higher userId values, keeping only the row with the smallest userId. Because this action cannot be undone, it is advised that you backup your data before beginning the deletion procedure. Confirming Duplicate Removal To confirm that all duplicates have been removed, repeat the Step 1 identification query. SELECT userName, userEmail, COUNT(*) as count FROM userDetails GROUP BY userName, userEmail HAVING count > 1; All duplicates have been successfully eliminated if this query yields no rows. Benefits of Employing GROUP BY and HAVING The GROUP BY and HAVING clauses serve as vital instruments for the aggregation of data and the filtration of grouped outcomes. These functionalities are especially useful for detecting and handling duplicate entries or for condensing extensive datasets. Below are the primary benefits of employing these clauses. Efficient Identification of Duplicates Data Aggregation and Summarization Filtering Aggregated Results with Precision Versatility Across Multiple Scenarios Compatibility and Simplicity Enhanced Query Readability Support for Complex Aggregations The GROUP BY and HAVING clauses serve as essential instruments for data aggregation, identifying duplicates, and filtering results. Their effectiveness, ease of use, and adaptability render them crucial for database management and data analysis activities, allowing users to derive insights and handle data proficiently across a variety of applications. Identifying Duplicates Using a Temporary Table When dealing with large datasets, it can be easier and more efficient to separate duplicates using a temporary table before deleting them. Creating the Table Make a temporary table to store duplicate groups according to predetermined standards (e.g. A. username, along with userEmail. CREATE TEMPORARY TABLE temp_view_duplicates AS SELECT username, userEmail, MIN (userId) AS minuid FROM userDetails GROUP BY username, userEmail, HAVING COUNT(*) > 1; Explanation: CREATE TEMPORARY TABLE temp_view_duplicates AS: Creates a temporary table named temp_view_duplicates. SELECT userName, userEmail, MIN(userId) AS minuid: Groups duplicates by userName and userEmail, keeping only the row with the smallest userId. GROUP BY userName, userEmail: Groups rows by userName, userEmail. HAVING COUNT(*) > 1: Filters only groups with more than one row, identifying duplicates. This temporary table will now contain one representative row per duplicate group (the row with the smallest id). Deleting Duplicates from the Main Table Now that we have a list of unique rows with duplicates in the temp_view_duplicates table, we can use the temporary table to remove duplicates while keeping only the rows with the smallest userId. Use the following DELETE command: DELETE FROM userDetails WHERE (username, userEmail) IN ( SELECT username, userEmail FROM temp_view_duplicates ) AND userId NOT IN ( SELECT minuid FROM temp_view_duplicates ); Explanation: WHERE (username, userEmail,) IN: Targets only duplicate groups identified in temp_view_duplicates. AND userId NOT IN (SELECT minuid FROM temp_view_duplicates): Ensures that only duplicate rows (those with higher userId values) are deleted. Verifying Results To confirm that duplicates have been removed, query the userDetails table: SELECT * FROM userDetails; Only unique rows should remain. Temporary tables (CREATE TEMPORARY TABLE) are automatically dropped when the session ends, so they don’t persist beyond the current session. When making extensive deletions, think about utilizing a transaction to safely commit or undo changes as necessary. Key Advantages of Using a Temporary Table Lower Complexity: By isolating duplicates, the removal process is simpler and clearer. Enhanced Efficiency: It's faster for large datasets, as it avoids repeated joins. Improved Readability: Using a temporary table makes the process more modular and easier to understand. Conclusion Eliminating duplicate records is essential for maintaining a well-organized database, improving performance, and ensuring accurate reporting. This guide presented two approaches: Direct Method with GROUP BY and HAVING Clauses: Ideal for small datasets, using self-joins to delete duplicates. Temporary Table Approach: More efficient for larger datasets, leveraging temporary storage to streamline deletion. Choose the method that best fits your data size and complexity to keep your database clean and efficient.
19 November 2024 · 8 min to read
MySQL

Installing MariaDB on Ubuntu 22.04

MariaDB is an open-source relational database management system, which has made it a popular alternative to MySQL. It is often included in LAMP stacks (which consist of Linux, Apache, MySQL, and PHP, sometimes with Python and Perl compilers). This document provides a brief guide to setting up MariaDB. The setup involves three steps: updating the package index, installing the mariadb-server, and activating a security script restricting unauthorized access to the remote host.   The sequence of commands looks like this: sudo apt update sudo apt install mariadb-server sudo mysql_secure_installation For this tutorial, we will use a Hostman cloud server with Ubuntu 22.04 installed. Before diving into this guide, we recommend performing initial setup steps, such as creating a user account with sudo privileges and setting basic UFW firewall rules. Step 1: Installing MariaDB Repositories are regularly updated to include stable versions of utilities. Distributions, on the other hand, include outdated releases that were current at the time of the build, so they need to be updated to avoid compatibility issues. This procedure is executed with the following command: sudo apt update Now we can install the package we need: sudo apt install mariadb-server The installation proceeds without prompting for a password or making any other configuration changes. Using MariaDB in this form on the server is not advisable, as it will operate in an insecure mode. To rectify this situation, we will apply the mysql_secure_installation script that comes with the software. This script will restrict access to the server and eliminate unauthorized accounts. Step 2: Setting Up MariaDB The security script modifies the insecure options that are set by default. For instance, it creates test accounts and allows remote connections using the root account. This potentially poses a risk of hacking and unauthorized access to the information stored in the created database. To run the script, use the following command: sudo mysql_secure_installation This command will initiate a series of prompts that allow you to change the database's security parameters.  The first prompt relates to the root account, and the system will request the password for the active database. Press Enter. This indicates that there is currently no protection. Enter current password for root (enter for none): Switch to unix_socket authentication [Y/n] Enter n and press Enter Change the root password? [Y/n] Enter Y and press Enter. New password: Re-enter new password: Enter and re-enter the new root user password and press Enter. Answer Yes (Y) to all the following prompts. Remove anonymous users? [Y/n] Disallow root login remotely? [Y/n] Remove test database and access to it? [Y/n] Reload privilege tables now? [Y/n] The system will remove the test database and anonymous accounts, disable access through the root account, and load the updated rules.  The installation and configuration of the MariaDB package are complete, and you can now begin using it. Alternatively, you can proceed to an optional step to create an administrator account to enable password access. Step 3: Create an Administrator Account By default, on Ubuntu, MariaDB is installed using the unix_socket plugin, which means that password prompts do not apply. In most cases, this approach provides a high level of security. However, it also complicates administrative tasks, such as those done through phpMyAdmin. When starting or stopping the server or managing logs, the root account is used. That is why we did not change its data. However, during a package update, these settings may change on their own, so it's better to enable password authentication right away. As an example, we will create an account named admin and give it the same privileges as the root account. First, open the MariaDB command line: sudo mariadb Next, create the new user: GRANT ALL ON *.* TO 'admin'@'localhost' IDENTIFIED BY 'password' WITH GRANT OPTION; Replace admin and password with any preferred combinations.  After creating the account, flush the privileges while keeping the settings in the current session: FLUSH PRIVILEGES; Now you can close the shell: exit; Next, you should test MariaDB to ensure that the settings are correct. Step 4: Diagnostics When the MariaDB is installed from the official repository, it automatically configures the settings to ensure that the MariaDB module starts automatically. However, it's still a good practice to manually check its status: sudo systemctl status mariadb The output on the screen will look something like this: If the utility is not running, you will need to start it manually and also enable the service: sudo systemctl enable mariadb sudo systemctl start mariadb After forcibly starting the service, you can make a test connection to the database using mysqladmin. It allows you to interact with the database with administrative rights, execute commands, and change settings. Here’s an example of connecting and displaying the version number: sudo mysqladmin version The output on the screen will look like this: If access was configured using the administrator password, you can use the command: mysqladmin -u admin -p version The current version output confirms that the database is running and functioning, and that the user has access to its contents. Conclusions We have completed an overview of the installation and configuration for the MariaDB database management system. We discussed methods to protect against unauthorized access to the database and the creation of a new user who will have access to information equal to that of the root user.
07 November 2024 · 5 min to read
MySQL

How to Calculate Age From Date of Birth Using TIMESTAMPDIFF in MySQL

Calculating age from a date of birth (DOB) is a common requirement in many applications. In MySQL, this can be efficiently achieved using the TIMESTAMPDIFF function. This tutorial will guide you through the process of calculating age using TIMESTAMPDIFF, handling edge cases, and integrating the query into applications. Prerequisites Before diving into the tutorial, ensure you have: A MySQL database set up and accessible. Basic knowledge of SQL queries and MySQL functions. A table with a date of birth column to work with. Overview of TIMESTAMPDIFF Function The TIMESTAMPDIFF function calculates the difference between two dates based on the specified unit of time (e.g., years, months, days). For calculating age, you will use TIMESTAMPDIFF to find the difference in years between the current date and the date of birth. TIMESTAMPDIFF(unit, datetime1, datetime2) unit: The unit of time for the result (e.g., YEAR, MONTH, DAY). datetime1: The first date (usually the date of birth). datetime2: The second date (usually the current date). Writing the Basic TIMESTAMPDIFF Query To calculate age from a date of birth, use the following query: SELECT TIMESTAMPDIFF(YEAR, date_of_birth, CURDATE()) AS ageFROM users; In this query: YEAR specifies that the result should be in years. date_of_birth is the column containing the date of birth. CURDATE() returns the current date. Handling Edge Cases When calculating age, consider the following edge cases: Leap Years Leap years do not significantly affect age calculations, as TIMESTAMPDIFF accurately accounts for these in its calculations. Birthdays on February 29 For individuals born on February 29, TIMESTAMPDIFF will handle their age calculation correctly, but be aware of potential issues if you use functions that do not recognize leap years. Different Date Formats Ensure that the date format stored in the database matches MySQL's date format (YYYY-MM-DD). If you encounter format issues, use the STR_TO_DATE function to convert strings to date formats. Practical Examples and Use Cases Here are some practical examples of using TIMESTAMPDIFF: Example 1: Calculate Age for a Specific User SELECT TIMESTAMPDIFF(YEAR, '1990-05-15', CURDATE()) AS age; This query calculates the age of someone born on May 15, 1990. Example 2: Age Calculation for All Users SELECT name, TIMESTAMPDIFF(YEAR, date_of_birth, CURDATE()) AS ageFROM users; This query retrieves names and ages of all users from the users table. Integrating the Query in Applications To integrate this query into an application: In a PHP Application: $query = "SELECT TIMESTAMPDIFF(YEAR, date_of_birth, CURDATE()) AS age FROM users";$result = mysqli_query($conn, $query); In a Python Application:  query = "SELECT TIMESTAMPDIFF(YEAR, date_of_birth, CURDATE()) AS age FROM users"  cursor.execute(query) Ensure that your application handles database connections securely and efficiently. Performance Considerations The TIMESTAMPDIFF function is optimized for performance, but be mindful of the following: Indexes: Ensure that the date_of_birth column is indexed to speed up queries. Query Optimization: For large datasets, consider optimizing queries to improve performance. Troubleshooting Common Issues Here are some common issues and their solutions: Incorrect Results Issue: Age calculation is incorrect. Solution: Ensure that dates are correctly formatted and the date_of_birth column contains valid date values. Query Errors Issue: Syntax or execution errors. Solution: Verify that the SQL syntax is correct and that you are using valid MySQL functions. Conclusion Calculating age from a date of birth using TIMESTAMPDIFF in MySQL is straightforward and efficient. By following the steps outlined in this tutorial, you can accurately determine age and handle various edge cases. Integrate these calculations into your applications and optimize performance for the best results.
10 September 2024 · 4 min to read
MySQL

How to Install and Configure phpMyAdmin on Ubuntu 22.04

phpMyAdmin is a specialized utility written in PHP that provides a graphical interface for managing MySQL databases via a browser. In addition to displaying tables visually, phpMyAdmin simplifies database management, allowing the creation of SQL queries through a control panel without directly writing commands or code. It implements the full functionality of SQL queries: viewing, adding, deleting, and modifying databases, as well as their tables, fields, and indexes. In this guide, we will install phpMyAdmin and all its dependencies on a remote host. The technological stack within which phpMyAdmin will work is as follows: MySQL database Nginx web server PHP interpreter Note that this guide uses the Nginx web server instead of the more common Apache for PHP. Therefore, the overall toolset demonstrated in this instruction looks like this: PHP + phpMyAdmin + Nginx + MySQL. Thus, Nginx handles user requests and redirects them to PHP via the FastCGI protocol. The PHP interpreter processes phpMyAdmin scripts, which "communicate" with and manage the MySQL database. Prerequisites To install and configure phpMyAdmin, you will need: A cloud server running Ubuntu 22.04.  Below we will describe how to deploy an Ubuntu server on Hostman. Step 1: Preparing the System Configuring the Cloud Server To create a cloud server on Hostman, log into the control panel and go to Cloud Servers in the left menu. Next, click Create server. The most important thing is to choose Ubuntu 22.04. You can customize the rest of the parameters as you wish. After completing the configuration, click Order. In a couple of minutes the server will be online and you'll be able to connect to it remotely via SSH, using the command: ssh root@IP For example: ssh [email protected] You can copy the command from your server's Dashboard. In our case, root is the default username for the Hostman cloud server. After entering the command, the terminal will prompt for the root password, which you also find on the Dashboard.  Updating the System Before installing the necessary components, update the list of available repositories: sudo apt update And update the packages already installed on the system: sudo apt upgrade Step 2: Installing MySQL First, install MySQL on your Ubuntu server: sudo apt install mysql-server -y Ensure the MySQL service is running: systemctl status mysql If it is, the console output will include the following status: Active: active (running) You can also check the MySQL version: mysql --version The console will display something like this: mysql  Ver 8.0.36-0 ubuntu 0.22.04.1 for Linux on x86_64 ((Ubuntu)) Note that this guide uses MySQL version 8.0.36. Next, run a special security script to configure MySQL: sudo mysql_secure_installation Log into MySQL to set a password for the root user: mysql Check the list of existing users: SELECT User, Host FROM mysql.user; The console will display a list of usernames and hosts: +------------------+-----------+| User             | Host      |+------------------+-----------+| debian-sys-maint | localhost || mysql.infoschema | localhost || mysql.session    | localhost || mysql.sys        | localhost || root             | localhost |+------------------+-----------+5 rows in set (0.00 sec) We are interested in the root user, so execute the following command for it: ALTER USER 'root'@'localhost' IDENTIFIED WITH mysql_native_password BY 'my_pass_123'; Replace my_pass_123 with a strong password. Exit MySQL: exit In the future, to log into MySQL, use the following command: mysql -u root -p The console will always prompt for the password that you just set. Efficient and scalable Virtual Servers Step 3: Installing Nginx In this example, we will use the Nginx web server as an alternative to Apache. Install it via the APT package manager: sudo apt install nginx -y After installation, check the status of the Nginx service: systemctl status nginx After installing, Nginx starts automatically, so the console output should show the status: Active: active (running) Check the Nginx version: nginx -v The console will display: nginx version: nginx/1.18.0 (Ubuntu) So, in this tutorial, phpMyAdmin will run on Nginx version 1.18.0. Now you can enter your server's address in the browser to ensure that Nginx responds to user HTTP requests. In our case: http://166.1.227.252 The browser should open the standard Nginx welcome page. After we install phpMyAdmin, it will be available at http://server-ip/phpmyadmin. Step 4: Installing PHP For phpMyAdmin to work, you need to install PHP on your Ubuntu server. We will download it from an independent software provider's repository, so first add a new remote repository to the APT package manager: sudo add-apt-repository ppa:ondrej/php Then install the FastCGI Process Manager (FPM) and an additional module for working with MySQL: sudo apt install php8.3-fpm php8.3-mysql -y To check that the installation was successful, query the PHP version: php -v The console will display an output similar to this: PHP 8.3.4 (cli) (built: Mar 16 2024 08:40:08) (NTS)Copyright (c) The PHP GroupZend Engine v4.3.4, Copyright (c) Zend Technologies    with Zend OPcache v8.3.4, Copyright (c), by Zend Technologies As you can see, this guide uses PHP version 8.3.4. Step 5: Installing phpMyAdmin To install phpMyAdmin on Ubuntu, download it from the official website. Select the latest version of the program in a .tar.gz archive, then copy the download link and use it in the wget command: wget -c https://files.phpmyadmin.net/phpMyAdmin/5.2.1/phpMyAdmin-5.2.1-english.tar.gz Next, unpack the downloaded archive: tar -xzvf phpMyAdmin-5.2.1-english.tar.gz In our case, we are using phpMyAdmin version 5.2.1. You can delete the archive itself: rm phpMyAdmin-5.2.1-english.tar.gz Move the unpacked directory to a separate directory specifically for phpMyAdmin: sudo mv phpMyAdmin-5.2.1-english /usr/share/phpmyadmin Create a symbolic link associated with the local host's web directory: ln -s /usr/share/phpmyadmin /var/www/html Now proceed to configure the Nginx web server. Step 6: Configuring Nginx Make changes to the web server's main configuration file to allow Nginx to open phpMyAdmin's root web page. sudo nano /etc/nginx/sites-available/default First, find the line defining the root page index parameter. By default, it looks like this: index index.html index.htm index.nginx-debian.html; To allow Nginx to process PHP files, add index.php so that the final line looks like this: index index.php index.html index.htm index.nginx-debian.html; Next, make changes to the FastCGI protocol handler so that Nginx can forward all requests to PHP files directly to the PHP interpreter. Find the root request handler code, which by default looks like this: location / {    # First attempt to serve request as file, then    # as directory, then fall back to displaying a 404.    try_files $uri $uri/ =404;} Add the PHP file request handler code right after it: location ~ \.php$ {    try_files $fastcgi_script_name =404;    include fastcgi_params;    fastcgi_pass unix:/run/php/php8.3-fpm.sock;    fastcgi_index index.php;    fastcgi_param DOCUMENT_ROOT $realpath_root;    fastcgi_param SCRIPT_FILENAME $realpath_root$fastcgi_script_name;} Overall, the file content should look like this: server { listen 80 default_server; listen [::]:80 default_server; root /var/www/html; index index.php index.html index.htm index.nginx-debian.html; server_name _; location / { try_files $uri $uri/ =404; } location ~ \.php$ { try_files $fastcgi_script_name =404; include fastcgi_params; fastcgi_pass unix:/run/php/php8.3-fpm.sock; fastcgi_index index.php; fastcgi_param DOCUMENT_ROOT $realpath_root; fastcgi_param SCRIPT_FILENAME $realpath_root$fastcgi_script_name; } } Check the Nginx configuration: nginx -t If the syntax is correct, the console will display: nginx: the configuration file /etc/nginx/nginx.conf syntax is oknginx: configuration file /etc/nginx/nginx.conf test is successful Restart the Nginx web server to apply all changes: sudo systemctl restart nginx At this point, all the necessary dependencies are installed, and you can access phpMyAdmin by going to: http://server-ip/phpmyadmin For example: http://166.1.227.252/phpmyadmin The main phpMyAdmin page should open in the browser. You can login to phpMyAdmin using the username and password of the MySQL user created to access the control panel and start managing databases. Hostman Cloud Databases As an alternative to deploying databases and management tools, Hostman provides pre-configured and ready-to-use cloud databases, including MySQL, PostgreSQL, Redis, MongoDB, and others. MySQL and PostgreSQL databases have pre-installed web-interfaces for database management: phpMyAdmin and Adminer. To create a cloud database, log in to the Hostman control panel and select Databases in the left sidebar menu. Click Create database. This will open the cloud database configuration page, which is similar to the cloud server configuration pages. In our case, we choose MySQL as the database type. However, in your projects, you can use any other databases. To apply the selected settings, you need to click the Order button. After this, you will be redirected to the main cloud database management page. The database will be configured and started in a few minutes, after which it will be available for work through the web interface or remote connection. To work with the database through the console terminal, you need to go to the Connection tab and copy the command to connect to the remote database via the MySQL client. For example, the connection command might look like this: mysql -u gen_user -p')<07dCV46*GdPE' -h 91.206.179.29 -P 3306 -D default_db After the -u flag, specify the username. After the -p flag, specify the root password in single quotes. After the -h flag, specify the IP address of the remote host. After the -P flag, specify the host port (for example, the standard port for MySQL is 3306, and for MongoDB, it is 27017). After the -D flag, specify the database name. Alternatively, in the upper left corner, you can click on the Web Interface button and choose one of the two available database management utilities. After this, a familiar login page will open in a new tab, where you will need to enter the login credentials for the database. Setup and manage your cloud database with ease Conclusion This tutorial demonstrated the installation and configuration of phpMyAdmin with the preliminary manual installation of all necessary dependencies: MySQL database Nginx web server PHP interpreter in FPM format In your own projects, you can expand the technological stack shown in this guide to a more familiar and common combination of Nginx + Apache + PHP. Additionally, as an alternative to manually deploying MySQL and phpMyAdmin, the creation of a pre-configured and ready-to-use cloud database on Hostman servers with pre-installed web-based database management interfaces, one of which is phpMyAdmin, was demonstrated. Hostman provides pre-configured and ready-to-use cloud databases, including MySQL, PostgreSQL, Redis, MongoDB, and others.
28 June 2024 · 9 min to read
MySQL

How to Create Tables in MySQL

Data starts with creating tables. Relational tables must follow certain rules. In MySQL, special queries are used to create tables, specifying the attributes (fields) of the table and the data types for each field and optionally providing field descriptions. In this article, we will describe how to work with tables in MySQL, explain the CREATE TABLE syntax, and show you how to create tables and properly enter data.  Creating Tables in MySQL There are three main ways to create tables. If the table is created from scratch, the first commands must describe all fields. For this, MySQL uses the CREATE TABLE statement with the following syntax:  CREATE TEMPORARY  TABLE IF NOT EXISTS table_name( column_name_1 data_type_1,column_name_2 data_type_2, ...,column_name_N data_type_N,) ; Required parameters:  table_name is the name of the table being created (must be unique, and for convenience, the name should describe what the table represents);  column_name_1 is the name of the column;  data_type_1 defines the type of data that will be stored in the column.  Optional parameters:  TEMPORARY. If used in the statement, a temporary table is created. It exists only in the current session and disappears when reconnecting to the database. Temporary tables are usually used to store intermediate data during complex selections. Only the user who created it has access to the temporary table.  IF NOT EXISTS prevents an error if a table with that name already exists. It does not check if the structure of the existing table matches the one we tried to create; it only checks the name. The second way to create a table in MySQL is based on a query:  CREATE TEMPORARY  TABLE IF NOT EXISTS table_name( column_name_1 data_type_1,column_name_2 data_type_2, ...,column_name_N data_type_N,) IGNORE | REPLACEAS query_expression; Required parameter:  query_expression is an SQL query based on the results of which the table is created. For example, the query might look like this:  SELECT id, column_1 FROM table WHERE id > 15  Optional parameter:  IGNORE | REPLACE specifies how to handle rows that duplicate unique key values. The full query statement might look like this:  CREATE TABLE movies_copy (id INT, title CHAR(50) UNIQUE, year YEAR, summary TEXT) IGNORE SELECT id, title, year, storyline as summary FROM movies; The third way is when a new table is created based on the structure of another table. We can say that we are copying another table: CREATE [TEMPORARY] TABLE [IF NOT EXISTS] table_nameLIKE old_tbl_name; old_tbl_name is the name of the table we want to "clone".  This method creates a table with the same structure as the original but does not copy the data stored in it. We get the same table but empty.  Data Types in MySQL MySQL supports various data types. Choosing the right type significantly affects the performance of the database, especially with large sizes. All data types can be divided into several groups.  Numeric Data Types Numeric types are divided into integer and floating-point. To store integers, data types TINYINT, SMALLINT, MEDIUMINT, INT, or BIGINT are used. Each of them allows storing values in the range from -2(N-1) to 2(N-1)-1, where N is the number of bits required for storage. If necessary, it is possible to use the UNSIGNED attribute to disallow negative values. In this case, the value range can be shifted to start from 0, for example, from 0 to 255 for TINYINT. The most common data type is INT. MySQL uses three data types for floating-point numbers: FLOAT (uses 4 bytes) — stores up to 24 decimal places; DOUBLE (uses 8 bytes) — stores up to 54 decimal places; DECIMAL (the number of bytes depends on the chosen precision). The DECIMAL data type is used to store exact fractional numbers. For example, it is used for storing financial data where precise results are needed during calculations. Synonyms (aliases) for DECIMAL include NUMERIC, DEC, and FIXED. For DECIMAL, you can choose the number of values you want to see before and after the decimal point, which determines the number of bytes it will use. DECIMAL can take two parameters DECIMAL(precision, scale). The precision parameter specifies the maximum number of digits the number can store, ranging from 1 to 65. The scale parameter specifies the maximum number of digits the number can contain after the decimal point, ranging from 0 to the precision value, with a default of 0. For example, with parameters DECIMAL(5,2), you can store the number 69839.12 or 71468.2. Character (String) Data Types CHAR has a fixed length of up to 255 characters. It is useful when you need to store short strings or when all data is approximately the same length. Since the length is fixed, the allocated space is also fixed. If the table is created with CHAR(10) (10 is the length of the string to be stored), all strings will have a length of 10. If fewer characters are entered, the remaining space will be filled with spaces, meaning that space in the database is allocated for nothing. VARCHAR stores variable-length character strings from 0 to 65535 characters, provided the MySQL version is higher than 5.0.3. It is useful when you do not know the length of the text to be stored. It uses only the necessary amount of space for the data. TEXT is intended for storing large amounts of character data. There are 4 types of TEXT: TINYTEXT, TEXT, MEDIUMTEXT, and LONGTEXT. They differ in the maximum length of the string they can contain. Due to its size, it is often stored separately, sorted differently, and not indexed to full length. The BLOB family has similar features. These data types can store large amounts of information in binary form. The BLOB family is very similar to TEXT. BLOB types include TINYBLOB, BLOB, MEDIUMBLOB, and LONGBLOB. ENUM stores a predefined set of string values specified when the column is created. It is suitable if a field frequently repeats certain values that are few and the list doesn't need frequent updates, such as car body types or planets in the solar system. All these values are stored as integers and take up less space than strings, using 1-2 bytes. SET is a string object that can contain 0 or more values, each chosen from a predefined list specified when the table is created (maximum size is 64 elements). For example, to store book genres in a column with a SET type. SET stores values as integers, using 1-8 bytes. Date and Time Data Types Several types are available for date and time. DATE stores only the date in 'YYYY-MM-DD' format and uses 3 bytes. TIME stores only the time in 'hh:mm:ss' format and uses 3 bytes, with a range from '-838:59:59.00' to '838:59:59.00'. YEAR stores the year, with a range of 1901-2155, using 1 byte. DATETIME uses 8 bytes. It allows storing values from the year 1001 to 9999 with a precision of 1 second in the format: 'YYYY-MM-DD hh:mm:ss'. It is not dependent on the time zone. TIMESTAMP uses 4 bytes, thus having a much smaller date range: from '1970-01-01 00:00:01' to '2038-01-19 03:14:07'. It is stored as the number of seconds elapsed since the Unix epoch (January 1, 1970, GMT). The displayed value depends on the time zone. Later versions added support for storing time in microseconds. When both date and time are needed, two types are required: DATETIME and TIMESTAMP. Constraints in MySQL To ensure database integrity, MySQL uses specific constraints (CONSTRAINT). They can be divided into two types: column-level and table-level constraints (applied to a specific column or the entire table). Constraints are declared during table creation. They include: NOT NULL — indicates that the column cannot contain a NULL value. UNIQUE — prevents duplicate values (all values in the column must be unique). PRIMARY KEY — only unique non-NULL values can be stored in the column. Only one such column can exist in a table. FOREIGN KEY — creates a relationship between two tables based on a specific column. CHECK — controls the values in the column, checking if they are acceptable. DEFAULT — sets a default value for the column. If the field is omitted when entering a record, the default value will be inserted. Index Types in MySQL An index is a structure that stores the value of a table column (or several columns) and references the rows where these values are located. Creating indexes helps increase MySQL's efficiency, significantly speeding up queries. Most indexes have a tree-like data structure (are B-tree indexes). Indexes take up memory space, so typically only the fields that are used for data retrieval are indexed. Without an index, a query search goes through all table records, which can be time-consuming and computationally intensive.  Indexes in MySQL speed up operations: Searching for rows matching a WHERE query; Retrieving rows during joins; Finding minimum (MIN()) and maximum (MAX()) values of a specific indexed column; Sorting or grouping tables, provided the operation uses the leftmost prefix of the used index. There are following types of Indexes in MySQL Primary key — This column uniquely identifies each row in the table. Usually specified when creating the table. If not done manually, MySQL will create a hidden key. The primary key contains unique values. If it consists of several columns, the combination of values must be unique. The primary key cannot have NULL values. A table can have only one primary key. Unique index — Ensures the uniqueness of values in one or more columns. Unlike the primary key, you can create many unique indexes. It can have NULL values. Composite index — An index on multiple columns. MySQL allows creating composite indexes containing up to 16 columns. Typically used to speed up queries that need to retrieve data from multiple fields. Indexes are not recommended for small tables. The improvement from using indexes will not be noticeable. Indexes should be created primarily for slow queries or the most frequently used ones. Collect query performance statistics and conduct an assessment to determine this. Creating indexes for everything is not a good idea. Example 1: Creating a Table Let's create a MySQL table from scratch to store a collection of movies: CREATE TABLE movies (id INT NOT NULL AUTO_INCREMENT PRIMARY KEY,title CHAR(100) NOT NULL,year YEAR NOT NULL,running_time_min INT NOT NULL,storyline TEXT); This table includes the following columns: id: Unique identifier for the movie. title: The movie's title. year: The release year of the movie. running_time_min: The movie's duration in minutes. storyline: A brief description of the movie's plot. All fields have the NOT NULL constraint. The primary key is the id field. Initially, the table only has columns with specified data types.  Now let's insert some data into the table. For this, MySQL uses the INSERT INTO statement with VALUES.   INSERT movies3(title, year, running_time_min, storyline) VALUES ('Harry Potter and the Philosophers Stone', 2001, 152, "An orphaned boy enrolls in a school of wizardry, where he learns the truth about himself, his family and the terrible evil that haunts the magical world."),('Harry Potter and the Chamber of Secrets', 2002, 162,"An ancient prophecy seems to be coming true when a mysterious presence begins stalking the corridors of a school of magic and leaving its victims paralyzed."),('The Green Mile', 1999, 188,'Death Row guards at a penitentiary, in the 1930s, have a moral dilemma with their job when they discover one of their prisoners, a convicted murderer, has a special gift.'),('Forrest Gump', 1994, 142,"The presidencies of Kennedy and Johnson, the Vietnam War, the Watergate scandal and other historical events unfold from the perspective of an Alabama man with an IQ of 75, whose only desire is to be reunited with his childhood sweetheart."),('Cast Away', 2000, 143,"A FedEx executive undergoes a physical and emotional transformation after crash landing on a deserted island."); The result will be this table: Example 2: Creating a Table from a Query Now, let's create a table based on a query. We will select all movies released after 1999: CREATE TABLE movies_query ASSELECT id, title, year, running_time_min FROM movies WHERE year > 1999; The result: Example 3: Creating a Table Based on Another Table's Structure We can create a table based on the structure of another table: CREATE TABLE movies_copy LIKE movies; This creates an empty table with the same structure as the movies table but without data. Foreign Keys When there are multiple tables in a database, you might need to link them. Foreign keys are used in MySQL for this purpose. A foreign key is a column (or group of columns) that creates a relationship between tables. It refers to the primary key in another table. The table with the primary key is called the parent table, and the table with the foreign key is the child table. Creating a Foreign Key CONSTRAINT symbol FOREIGN KEYindex_name (col_name, ...)REFERENCES tbl_name (col_name,...)ON DELETE reference_optionON UPDATE reference_option Mandatory Parameters: FOREIGN KEY [index_name] (col_name, ...): Specifies the field to be used as a foreign key. index_name: Name of the index. col_name: Name of the column. REFERENCES tbl_name (col_name, ...): Specifies the column of the parent table with which our foreign key will be associated. tbl_name: Name of the table. col_name: Name of the column. Optional Parameters: CONSTRAINT symbol: Used to create and delete constraints. ON DELETE/ON UPDATE: Defines what to do when the parent table is deleted or updated. Options include: CASCADE: Automatically deletes or updates records in the child table when the parent table's records are deleted or updated. SET NULL: Sets the value to NULL in the child table when the parent table's records are deleted or updated. RESTRICT: Prevents deletion or updating of records in the parent table if they are used in the child table. Example 4: Creating a Table with a Foreign Key Let's create a table for movie genres: CREATE TABLE genres (id INT AUTO_INCREMENT PRIMARY KEY,genre VARCHAR(200) UNIQUE NOT NULL); Populate the table: INSERT INTO genres (genre) VALUES ('drama'),('fantasy'),('sci-fi'),('cartoon'); We will get the id for each genre. Example of creating a new table in MySQL with a FOREIGN KEY: CREATE TABLE movies2 (id INT NOT NULL AUTO_INCREMENT PRIMARY KEY,title CHAR(100) NOT NULL,year YEAR NOT NULL,running_time_min INT NOT NULL,genre_id INT,FOREIGN KEY (genre_id) REFERENCES genres (id)); Our table: To display the genres instead of just numbers, you can use a LEFT JOIN with the genres table: SELECT movies2.id, title, year, genre FROM movies2 LEFT JOIN genres ON genres.id = genre_id; Manipulating Tables Various commands can be used to work with an already created table. Here are some basic MySQL commands for renaming, modifying, deleting, and adding columns, and changing data types. Renaming a Table Option 1. Used if we initially indicated which database we were working in: USE movies_db;RENAME TABLE movies2 TO cinema; Option 2. Applies if the database is not specified: RENAME TABLE movies_db.movies2 TO movies_db.cinema; You can also use the RENAME TABLE command to move a table from one database to another: RENAME TABLE movies_db.movies2 TO cinema_db.cinema; Adding a New Column In MySQL, the ALTER TABLE statement is used to change a table in some way. ALTER TABLE cinemaADD Language VARCHAR(50) NULL; Deleting a Column ALTER TABLE cinemaDROP COLUMN Language; Renaming and Modifying Columns Use the CHANGE command to rename and redefine a column: ALTER TABLE cinema CHANGE year date INT NOT NULL; If you don't want to change the column name, specify the old name twice: ALTER TABLE cinema CHANGE year year INT NOT NULL; Use the MODIFY command to change the column definition without renaming it: ALTER TABLE cinemaMODIFY COLUMN title VARCHAR(100); Use the RENAME COLUMN command to change a column's name: ALTER TABLE cinema RENAME COLUMN running_time_min TO running_time; Deleting Operations To clear a table of data, use the TRUNCATE TABLE command: TRUNCATE TABLE cinema; To completely remove a table from the database, use the DROP TABLE command: DROP TABLE cinema; Adding and Removing Foreign Keys To add a foreign key: ALTER TABLE cinemaADD FOREIGN KEY (producer_id) REFERENCES producer (Id); Conclusion These operators and examples cover the basic operations with tables, enabling you to perform many useful tasks. These skills can be applied, including for working with MySQL cloud databases deployed on platforms like Hostman.
27 June 2024 · 13 min to read
MySQL

How to Install MySQL on Ubuntu

MySQL is an open-source database management system often installed as part of the popular LAMP stack (Linux, Apache, MySQL, PHP). It is a relational database that uses SQL (Structured Query Language). In short, the installation process is very easy: Update your package index. sudo apt update Install the mysql-server package. sudo apt install mysql-server Run the built-in security script. sudo mysql_secure_installation Below we'll explain in more detail how to install MySQL on an Ubuntu server and perform basic setup. Prerequisites To follow this guide, you will need: A cloud server running Ubuntu 22.04. A non-root user with sudo privileges. Step 1: Install MySQL To install MySQL on Ubuntu 22.04, first update your server's package index using apt: sudo apt update Install the default package: sudo apt install mysql-server MySQL will be installed, but it will not prompt you to set a password or make other configuration changes. Since this leaves MySQL insecure, we will address the setup in the next step. Step 2: Configure MySQL If you are installing MySQL on your Ubuntu server for the first time, you need to run the internal security script. It changes settings like remote root access and default users, which are not secure by default. sudo mysql_secure_installation This command will guide you through a series of prompts to make changes to your MySQL security settings. First, you'll be asked if you want to configure the Validate Password Plugin, which can be used to test the strength of MySQL passwords. Regardless of your choice, you will then need to set a password for the MySQL root user. Create a secure password, enter it, and then confirm it. You can now press Y and then ENTER to accept the default values for all subsequent questions. This will remove some anonymous users along with the test database and disable remote root logins. All changes will then be applied to your MySQL. Note that although you set a password for the root user, this user is not configured for password authentication when connecting to the MySQL shell. If desired, you can change this setting by performing step 3. Step 3 (Optional): Configure Authentication and Privileges The MySQL root user is set to authenticate using the auth_socket plugin by default, rather than with a password. In many cases, this improves security and usability, but it complicates things if you need to allow an external program (like phpMyAdmin) to access MySQL. To use a password to connect to MySQL as the root user, you need to change the authentication method from auth_socket to caching_sha2_password. To do this, open the MySQL command line: sudo mysql Then check which authentication method each of your MySQL accounts uses: SELECT user,authentication_string,plugin,host FROM mysql.user; In this example, you can see that the root user uses auth_socket authentication. To configure password authentication, run the ALTER USER command. Be sure to replace password with your own password and remember that this command will change the root user's password you set in step 2: ALTER USER 'root'@'localhost' IDENTIFIED WITH caching_sha2_password BY 'password'; Then run FLUSH PRIVILEGES to apply the changes: FLUSH PRIVILEGES; Check the authentication methods for each user again to ensure that the root user no longer uses auth_socket: SELECT user,authentication_string,plugin,host FROM mysql.user; After confirming that the root user now authenticates with a password, you can exit the MySQL shell: exit Some people find it more convenient to connect to MySQL through a separate user. To create one, reopen the MySQL shell: sudo mysql Note: If you have enabled password authentication for the root user as described above, you will need to use a different command to access the shell. The above command will launch your MySQL client with ordinary user permissions, so to gain administrator privileges for your database, run: mysql -u root -p Now create a new user and choose a strong password: CREATE USER 'hostman'@'localhost' IDENTIFIED BY 'password'; Then grant the new user the necessary privileges. For example, you can give the user access to all tables in the database and the right to add, modify, and delete user rights with the following command: GRANT ALL PRIVILEGES ON *.* TO 'hostman'@'localhost' WITH GRANT OPTION; Note that at this stage you do not need to rerun the FLUSH PRIVILEGES command. This command is only necessary when modifying the access tables using INSERT, UPDATE, or DELETE statements. Since you created a new user rather than modifying an existing one, FLUSH PRIVILEGES is not required here. Now exit the MySQL shell: exit Finally, let's test our MySQL. Step 4: Test MySQL Regardless of how you installed it, MySQL should have started automatically. Check its status with the following command: systemctl status mysql.service If MySQL is not running, you can start it with: sudo systemctl start mysql For additional verification, you can try connecting to the database using the mysqladmin tool. This client allows you to run administrative commands. For example, the following command tells mysqladmin to connect to MySQL as the root user (-u root), prompt for a password (-p), and return the version: sudo mysqladmin -p -u root version This way, you can ensure that MySQL is running and working.   Congratulations! Your server now has a basic MySQL setup running and configured. You can now start working with your databases. 
27 June 2024 · 5 min to read

Answers to Your Questions

What types of SQL databases are supported?

Hostman supports all popular database management solutions, from MySQL and PostgreSQL to open-source solutions like Apache Kafka and OpenSearch. You can seamlessly continue working with your familiar management system, but now in the cloud.

How quickly can I create a new SQL database for my project?

Launching a new project will take just a few minutes - simply use the Hostman control panel. Immediately after payment, you can start using your SQL database.

How is the security of SQL databases ensured on your platform?

Hostman maintains a high level of security by hosting the hardware in secure Tier III data centers. Hostman's staff monitors not only server stability but also data protection. Additionally, you can configure automatic backups for all sensitive data.

How does scaling of SQL databases for your clients work?

You can always add additional resources directly in the control panel, scaling them as you see fit with hourly billing. To reduce resource capacity, simply reach out to the friendly Hostman support team.

What performance monitoring tools for SQL do you provide?

You can use any database monitoring tool of your choice. By default, Hostman ensures uninterrupted and efficient operation of the database and does not provide a separate monitoring tool.

What options are available for automatic backup of SQL databases?

Take advantage of the additional service of automatic backup for valuable data, and your information will be under special protection.

How are updates to SQL servers and supported versions handled?

Hostman's technical specialists handle database updates and release verification. You can install the latest stable versions directly from the control panel.

How do you manage the configuration and parameters of SQL servers?

Configure your server directly in the control panel or use a configuration file (deliver it to the server with a single PUSH).

What backup and restoration options are available for SQL databases?

With the additional backup service, your data will always be available for reliable storage and recovery.

How is compatibility maintained with various SQL clients?

Compatibility with various SQL clients is maintained through standardized protocols and adherence to SQL language standards.

Do you have questions,
comments, or concerns?

Our professionals are available to assist you at any moment,
whether you need help or are just unsure of where to start.
Email us
Hostman's Support