How to Create a Telegram Bot Using Node.js
Telegram bots have become an integral part of this messenger: every day, hundreds of thousands of people use them—and for good reason. Telegram bots are easy for users to interact with, and developers can quickly and comfortably create them thanks to the constantly evolving Telegram API, which aims to improve daily.
The main idea behind Telegram bots is task automation and extending the messenger’s functionality. Bots can serve as simple assistants performing commands or as complex systems with full-fledged business logic. From sending out news updates to implementing intricate game mechanics—the possibilities for building bots are nearly limitless.
With Node.js, you can implement almost any functionality for a Telegram bot, thanks to its ecosystem of libraries and frameworks. Node.js, as a platform with asynchronous request handling, is ideal for building bots that need to work in real-time and interact with thousands of users simultaneously. Here are some capabilities that can be implemented:
Basic Functionality
Responding to commands
Inline bots
Buttons
Integration with External Services
APIs and databases
Webhooks
Notifications
Sending scheduled notifications or alerts when certain events occur
Automatically sending news updates from sources every N seconds
Analytics
Collecting various statistics
Creating a Telegram Bot
First, you need to create a bot within Telegram. Use the official BotFather bot to register your bot. Click the "Start" button (or if you’ve already interacted with the bot, send the command /start). In BotFather’s response, find and select the /newbot command. BotFather will ask you to provide a bot name and then a username. The username must end with the word bot. For example, if your bot’s name is Tetris, the username should be one of the following:
TetrisBot
Tetris_bot
Tetrisbot
Tetris_Bot
If everything is entered correctly, your bot will be created. BotFather will also give you a unique bot token, which you must keep private.
Development
We will create a bot that sends various quizzes in the form of Telegram polls. The quiz topics will be school subjects. The bot will have two commands: one for sending questions and another for selecting quiz topics.
Preparing the Environment
Before starting development, ensure that Node.js and npm are installed on your PC. You can download Node.js from the official website, and npm will be installed automatically along with Node.js. If you are using Linux, you can install npm by following this guide.
Once Node.js is installed, you can begin developing the bot. First, create a new private repository on GitHub and select Node under the Add .gitignore section.
Now, clone this repository to your PC using the terminal. If you want the project to be on your desktop, enter:
cd Desktop
Then enter:
git clone https://github.com/username/School-Quiz
Replace username with your actual GitHub username. You can also replace School-Quiz with any other project name.
After cloning the repository, without closing the terminal, enter:
cd School-Quiz
Replace School-Quiz with the actual name of the folder where your project was cloned from GitHub.
To initialize the project, run the following command:
npm init
You will be prompted to enter the package name, version, description, default entry file, test command, Git repository, keywords, author, and license. You can press "Enter" to accept the default values.
Now, let’s install the library that will be used to write the bot’s code. Enter the following command in the terminal (ensuring that you are in the project folder):
npm install node-telegram-bot-api
Writing Code for the Quiz
After the installation is complete, you can start writing the code. Open the package.json file and find the scripts section. Inside it, above the test command, add the following line:
"start": "node index.js",
This allows you to start the project by simply entering npm start in the terminal instead of typing node followed by the file name.
Now, create a file called index.js and add the following code:
const TelegramBot = require('node-telegram-bot-api');
const fs = require('fs');
const bot = new TelegramBot('TOKEN', { polling: true }); // Replace 'TOKEN' with the actual token provided by BotFather
const ADMIN_ID = '1402655980';
let awaitingSupportMessage = {}; // Stores information about users waiting for support
// Stores selected topics for users
let userTopics = {};
// Topics and their respective question files
const topics = {
math: { name: 'Math', file: 'questions/math.json' },
spanish: { name: 'Spanish', file: 'questions/spanish.json' },
history: { name: 'History', file: 'questions/history.json' }
};
// Function to retrieve questions based on selected topics
function getQuestionsByTopics(userId) {
const selectedTopics = userTopics[userId] || Object.keys(topics);
let allQuestions = [];
selectedTopics.forEach(topic => {
const questions = JSON.parse(fs.readFileSync(topics[topic].file, 'utf8'));
allQuestions = allQuestions.concat(questions);
});
return allQuestions;
}
function getRandomQuestion(userId) {
const questions = getQuestionsByTopics(userId);
const randomIndex = Math.floor(Math.random() * questions.length);
return questions[randomIndex];
}
bot.onText(/\/quiz/, (msg) => {
const chatId = msg.chat.id;
const userId = msg.from.id;
// Retrieve a random question
const questionData = getRandomQuestion(userId);
// Send the poll as a quiz
bot.sendPoll(
chatId,
questionData.question, // The question text
questionData.options, // Answer options
{
type: 'quiz', // Quiz type
correct_option_id: questionData.correct_option_id, // Correct answer
is_anonymous: false // The quiz won't be anonymous
}
).then(pollMessage => {
// Handle poll results
bot.on('poll_answer', (answer) => {
if (answer.poll_id === pollMessage.poll.id) {
const selectedOption = answer.option_ids[0];
// Check if the answer is correct
if (selectedOption !== questionData.correct_option_id) {
bot.sendMessage(chatId, questionData.explanation);
}
}
});
});
});
bot.onText(/\/settopic/, (msg) => {
const chatId = msg.chat.id;
const userId = msg.from.id;
const keyboard = Object.keys(topics).map(topicKey => ({
text: `${(userTopics[userId] || []).includes(topicKey) ? '✅ ' : ''}${topics[topicKey].name}`,
callback_data: topicKey
}));
bot.sendMessage(chatId, 'Select the topics for questions:', {
reply_markup: {
inline_keyboard: [keyboard]
}
});
});
// Topic selection handler
bot.on('callback_query', (callbackQuery) => {
const message = callbackQuery.message;
const userId = callbackQuery.from.id;
const topicKey = callbackQuery.data;
// Initialize selected topics for the user if they don't exist
if (!userTopics[userId]) {
userTopics[userId] = Object.keys(topics);
}
// Add or remove the selected topic
if (userTopics[userId].includes(topicKey)) {
userTopics[userId] = userTopics[userId].filter(t => t !== topicKey);
} else {
userTopics[userId].push(topicKey);
}
// Update the message with buttons
const keyboard = Object.keys(topics).map(topicKey => ({
text: `${userTopics[userId].includes(topicKey) ? '✅ ' : ''}${topics[topicKey].name}`,
callback_data: topicKey
}));
bot.editMessageReplyMarkup({
inline_keyboard: [keyboard]
}, { chat_id: message.chat.id, message_id: message.message_id });
});
bot.onText(/\/start/, (msg) => {
const chatId = msg.chat.id;
bot.sendMessage(chatId, "Hello! Type /quiz to start a quiz. Use /settopic to choose topics.");
});
console.log('Bot is running.');
Quiz Questions Files
Now, create a folder named questions inside your project. Within this folder, create three JSON files:
spanish.json
[
{
"question": "How do you say 'I' in Spanish?",
"options": ["Yo", "Tú", "Nosotros"],
"correct_option_id": 0,
"explanation": "The correct answer is: Yo."
},
{
"question": "What does the verb 'correr' mean?",
"options": ["to run", "to walk", "to stand"],
"correct_option_id": 0,
"explanation": "The correct answer is: to run."
},
{
"question": "How do you say 'she' in Spanish?",
"options": ["Tú", "Ella", "Vosotros"],
"correct_option_id": 1,
"explanation": "The correct answer is: Ella."
}
]
history.json
[
{
"question": "In which year did World War II begin?",
"options": ["1939", "1941", "1914"],
"correct_option_id": 0,
"explanation": "The correct answer is: 1939."
},
{
"question": "Who was the first president of the United States?",
"options": ["Abraham Lincoln", "George Washington", "Franklin Roosevelt"],
"correct_option_id": 1,
"explanation": "The correct answer is: George Washington."
},
{
"question": "Which country was the first to send a human into space?",
"options": ["USA", "USSR", "China"],
"correct_option_id": 1,
"explanation": "The correct answer is: USSR."
}
]
math.json
[
{
"question": "What is 2 + 2?",
"options": ["3", "4", "5"],
"correct_option_id": 1,
"explanation": "The correct answer is: 4."
},
{
"question": "What is 5 * 5?",
"options": ["10", "20", "25"],
"correct_option_id": 2,
"explanation": "The correct answer is: 25."
},
{
"question": "What is 10 / 2?",
"options": ["4", "5", "6"],
"correct_option_id": 1,
"explanation": "The correct answer is: 5."
}
]
Each JSON file contains the question, answer options, the index of the correct answer, and an explanation that will be sent if the user selects the wrong answer.
Telegram Stars
Recently, Telegram introduced an internal currency called Telegram Stars, along with an API update allowing bots to support donations in Stars. Let’s add a /donate command to the index.js file. When users send this command, the bot will generate a payment invoice.
Add the following code inside index.js:
bot.onText(/\/donate/, (msg) => {
const chatId = msg.chat.id;
bot.sendInvoice(chatId,
'Donation',
'Support the project with a donation',
'unique_payload',
'', // Empty provider_token for Stars Payments
'XTR', // Currency "XTR"
[{ label: 'Donation', amount: 1 }] // Amount: 1 Star
);
});
Support Command
Let’s add another command called /support. This command allows a large number of users to contact you without creating multiple unnecessary chats. Users will be able to send text, photos, and videos, and the bot will forward these messages directly to the admin (in this case, you).
Place the following code inside index.js.
At the beginning of the file, add:
const ADMIN_ID = 'ID';
let awaitingSupportMessage = {}; // Stores information about users waiting for support
The ADMIN_ID tells the bot where to forward the user’s message. To find your ID, you can use the Get My ID bot by simply sending the /start command to it.
At the end of the file, add the following code:
bot.onText(/\/support/, (msg) => {
const chatId = msg.chat.id;
const userId = msg.from.id;
// Inform the user that we are waiting for their message
bot.sendMessage(chatId, "Please send your message in a single message, including text, photos, or videos!");
// Mark the user as currently composing a support message
awaitingSupportMessage[userId] = true;
});
Handling All Messages
This section processes all incoming messages and checks if they are part of a support request. Add the following code to handle different types of user content:
bot.on('message', (msg) => {
const userId = msg.from.id;
// Check if the user is sending a message after the /support command
if (awaitingSupportMessage[userId]) {
const chatId = msg.chat.id;
const caption = msg.caption || ''; // Include caption if present
// Check the type of message and forward the corresponding content to the admin
if (msg.text) {
// If the message contains text
bot.sendMessage(ADMIN_ID, `New support request from @${msg.from.username || msg.from.first_name} (ID: ${userId}):\n\n${msg.text}`);
} else if (msg.photo) {
// If the message contains a photo
const photo = msg.photo[msg.photo.length - 1].file_id; // Select the highest resolution photo
bot.sendPhoto(ADMIN_ID, photo, { caption: `New support request from @${msg.from.username || msg.from.first_name} (ID: ${userId})\n\n${caption}` });
} else if (msg.video) {
// If the message contains a video
const video = msg.video.file_id;
bot.sendVideo(ADMIN_ID, video, { caption: `New support request from @${msg.from.username || msg.from.first_name} (ID: ${userId})\n\n${caption}` });
} else {
// If the message type is unsupported
bot.sendMessage(msg.chat.id, "Sorry, this type of message is not supported.");
}
// Confirm to the user that their message has been sent
bot.sendMessage(chatId, "Your message has been sent. The administrator will contact you soon.");
// Remove the user from the list of those composing a support message
delete awaitingSupportMessage[userId];
}
});
Deployment on a Server
For our bot to operate continuously, we must upload and run it on a server. For deployment, we will use Hostman cloud servers.
Uploading to GitHub
Before launching the bot on the server, you first need to upload the project files to GitHub.
Run the following commands in the console in sequence:
Add all changes in the current directory to the next commit:
git add .
Create a commit with the message "first commit", recording all changes added with git add:
git commit -m "first commit"
Push the changes to GitHub:
git push
Server Setup
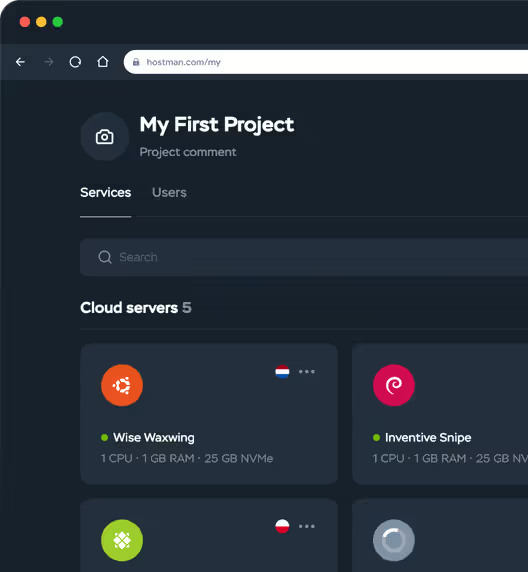
Go to your Hostman control panel and:
Create a New Project (optional): Specify an icon, a name, a description, and add users if necessary.
Create a Cloud Server: Either from your project or from the Cloud servers page start creating a new cloud server.
Select the Region: Choose the region that is closest to you or where the lowest ping is available.
Go to the Marketplace tab in the second step and select Node.js. Set the Ubuntu version to the latest one. This ensures that Node.js will already be installed on the server when it starts, so you won’t need to install it manually.
Choose Configuration: Select the configuration according to your needs. For running the project, the minimum configuration is sufficient. If the project requires more resources in the future, you can upgrade the server without disrupting its operation.
Network Settings: Ensure that you assign a public IP for the server. Configure any additional services as needed.
Authorization and Cloud-init: In the Authorization step, you can add your SSH key to the server. However, it’s optional, and you can leave these settings as they are.
Server Information: Provide the server’s name and description, and select the project to which you want to add the server.
Once everything is set up, click the Order button. After a short while, the server will be up and running, and you can proceed with the next steps.
Launching the Bot
After creating the server, go to the Dashboard tab, copy the Root password, and open the Console tab. Enter the username root and press Enter. Next, paste the password you copied and press Enter again. When typing or pasting the password, it will not be visible! If everything is correct, you will see a welcome message.
Now, run the following command to get the latest updates:
sudo apt-get update
Create a new folder where you will place the bot. Enter these commands in sequence:
cd /sudo mkdir Botcd Bot
You can replace the folder name "Bot" with any other name you choose.
To ensure Git is installed on the server (it is usually pre-installed by default), check the version using:
git --version
Next, set up global Git settings to link it to your GitHub profile:
git config --global user.name "your GitHub username"git config --global user.email "email used during registration"
After this, clone the repository by entering the following command with your repository URL:
git clone https://github.com/username/School-Quiz
During cloning, you will be prompted to enter your username and then your password.
If you have two-factor authentication (2FA) enabled on your GitHub account, entering your regular password will result in an error saying the password is incorrect. To clone a repository with 2FA enabled, you need to create a personal access token.
Click your profile picture in the top-right corner and select “Settings”.
In the left-hand menu, click “Developer settings”.
Under the “Personal access tokens” section, select “Tokens (classic)” and click “Generate new token”.
Set token parameters:
In the “Note” field, provide a description for the token.
Set the expiration date for the token in the “Expiration” field.
Under “Select scopes”, choose the necessary permissions for the token. For example, to work with repositories, select repo.
Click “Generate token”.
Copy the generated token and store it in a secure place. Note that you won’t be able to view the token again after closing the page.
Once you have the personal access token, use it instead of your password when prompted during the repository cloning process.
Navigate to your project folder using the following command:
cd School-Quiz
Replace School-Quiz with the actual name of your project. To install the project dependencies, run:
npm install
Once the packages are installed, you can start the project by running:
npm start
In the console, you should see the message “Bot is running”. However, there is one issue—if you restart the server or close the console, the bot will stop working! To ensure the bot runs continuously and automatically starts after a server reboot, you need to install a process manager like pm2.
Install pm2 globally using the following command:
sudo npm install pm2 -g
Next, start the Node.js server using pm2:
sudo pm2 start index.js --name "bot-quiz" --watch
In this example, the process is named bot-quiz, but you can use any name you prefer.
Set up automatic startup on server reboot:
sudo pm2 startup
Save all the changes made:
sudo pm2 save
Conclusion
In this guide, we covered the entire process of creating a Telegram bot using Node.js, from registering the bot via BotFather to deploying the finished solution on a server.
31 January 2025 · 15 min to read