Sign In
Sign In

Cloud Server

Deploy your cloud server in minutes and experience the freedom to scale your
infrastructure effortlessly. Fast, secure, and flexible cloud server solution
designed to meet your unique needs without the constraints of traditional
servers.
Contact Sales
Hostman Cloud
Blazing 3.3 GHz Processors
& NVMe Disks
Experience unparalleled speed with processors optimized for demanding applications, combined with ultra-fast NVMe disks for quick data retrieval.
200 Mbit Channels,
Unlimited Traffic
Enjoy stable, high-speed connectivity with unthrottled traffic, ensuring smooth performance even during peak usage periods.
24/7 Monitoring
& Support
Stay worry-free with round-the-clock monitoring and professional support, ensuring your systems are always operational.
Cost-Effective
Management
Our cloud server solutions are designed to deliver maximum value for your money, offering flexible pricing without compromising on performance.

Cloud server pricing

We offer various cloud server plans, tailored to your exact needs.
Get the best performance at a price that fits your budget.
New York
1 x 3 GHz CPU
CPU
1 x 3 GHz
1 GB RAM
RAM
1 GB
25 GB NVMe
NVMe
25 GB
200 Mbps Bandwidth
Bandwidth
200 Mbps
Public IP
$4
 /mo
1 x 3 GHz CPU
CPU
1 x 3 GHz
2 GB RAM
RAM
2 GB
40 GB NVMe
NVMe
40 GB
200 Mbps Bandwidth
Bandwidth
200 Mbps
Public IP
$5
 /mo
2 x 3 GHz CPU
CPU
2 x 3 GHz
2 GB RAM
RAM
2 GB
60 GB NVMe
NVMe
60 GB
200 Mbps Bandwidth
Bandwidth
200 Mbps
Public IP
$6
 /mo
2 x 3 GHz CPU
CPU
2 x 3 GHz
4 GB RAM
RAM
4 GB
80 GB NVMe
NVMe
80 GB
200 Mbps Bandwidth
Bandwidth
200 Mbps
Public IP
$8
 /mo
4 x 3 GHz CPU
CPU
4 x 3 GHz
8 GB RAM
RAM
8 GB
160 GB NVMe
NVMe
160 GB
200 Mbps Bandwidth
Bandwidth
200 Mbps
Public IP
$17
 /mo
8 x 3 GHz CPU
CPU
8 x 3 GHz
16 GB RAM
RAM
16 GB
320 GB NVMe
NVMe
320 GB
200 Mbps Bandwidth
Bandwidth
200 Mbps
Public IP
$37
 /mo
CPU
RAM
Gb
NVMe
Gb
Public IP
$0
 /mo

Deploy any software in seconds

Select the desired OS or App and install it in one click
OS Distributions
Pre-installed Apps
Custom Images
Ubuntu
Debian
CentOS

Hostman's commitment to simplicity
and budget-friendly solutions

1 CPU
2 CPU
4 CPU
8 CPU
Configuration
1 CPU, 1 GB RAM, 25 GB SSD
Hostman
DigitalOcean
Google Cloud
AWS
Vultr
Price
$4
$6
$6.88
$7.59
$5
Tech support
Free
$24/mo
$29/mo + 3% of
monthly charges
$29/mo or 3% of
monthly charges
Free
Backups
from $0.07/GB
20% or 30% higher
base daily/weekly fee
$0.03/GB per mo
$0.05/GB per mo
20% higher base
monthly/hourly fee
Bandwidth
Free
$0.01 per GB
$0.01 per GB
$0.09/GB first
10 TB / mo
$0.01 per GB
Live chat support
Avg. support response time
<15 min
<24 hours
<4 hours
<12 hours
<12 hours

What is a cloud server?

Cloud server is a virtualized computing resource hosted in the cloud, designed to deliver powerful performance without the need for physical hardware. It is built on a network of connected virtual machines, which enables flexible resource allocation, instant scalability, and high availability. Unlike traditional on-premises servers, a cloud-based server allows users to adjust resources dynamically, making it ideal for handling fluctuating workloads or unpredictable traffic spikes. Whether you're running an e-commerce store, a SaaS platform, or any application, a cloud web server provides the adaptability necessary to grow with your business.

Cloud servers solve a wide range of challenges, from reducing infrastructure costs to improving uptime and reliability. By leveraging the cloud, businesses can avoid the upfront investment and maintenance costs associated with physical servers. Additionally, a cloud server system allows users to deploy applications quickly, scale resources in real-time, and manage data more efficiently. The key benefits for clients include operational flexibility, cost savings, and the ability to respond quickly to changing demands.

Ready to buy a cloud server?

1 CPU / 1GB RAM / 25GB NVMe / 200 Mbps / $2/mo

Efficient tools for your convenient work

See all Products

Backups, Snapshots

Protect your data with regular backups and snapshots, ensuring you never lose crucial information

Firewall

Enhance your security measures with our robust firewall protection, safeguarding your infrastructure against potential threats

Load Balancer

Ensure optimal performance and scalability by evenly distributing traffic across multiple servers with our load balancer feature

Private Networks

Establish secure and isolated connections between your servers with private networks, shielding sensitive data and enhancing network efficiency

Trusted by 500+ companies and developers worldwide

One panel to rule them all

Easily control your database, pricing plan, and additional services
through the intuitive Hostman management console
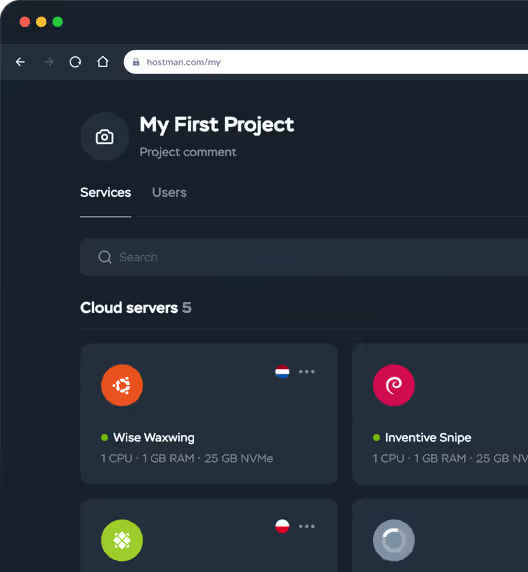
Project management
Organize your multiple cloud servers and databases into a single, organized project, eliminating confusion and simplifying management
Software marketplace
24 ready-made assemblies for any tasks: frameworks, e-commerce, analytics tools
Mobile responsive
Get the optimal user experience across all devices with our mobile-responsive design
Hostman Cloud

Code locally, launch worldwide

Our servers, certified with ISO/IEC 27001, are located in Tier 3 data
centers across the US, Europe, and Asia
🇺🇸 San Francisco
🇺🇸 San Jose
🇺🇸 Texas
🇺🇸 New York
🇳🇱 Amsterdam
🇳🇬 Lagos
🇩🇪 Frankfurt
🇵🇱 Gdansk
🇦🇪 Dubai
🇸🇬 Singapore
Anup k.
Associate Cloud Engineer
5.0 out of 5

"Hostman Comprehensive Review of Simplicity and Potential"

It been few years that I have been working on Cloud and most of the cloud service...
Mansur H.
Security Researcher
5.0 out of 5

"A perfect fit for everything cloud services!"

Hostman's seemless integration, user-friendly interface and its robust features (backups, etc) makes it much easier...
Adedeji E.
DevOps Engineer
5.0 out of 5

"Superb User Experience"

For me, Hostman is exceptional because of it's flexibility and user-friendliness. The platform's ability to offer dedicated computing resources acr...
Yudhistira H.
Mid-Market(51-1000 emp.)
5.0 out of 5

"Streamlined Cloud Excellence!"

What I like best about Hostman is their exceptional speed of deployment, scalability, and robust security features. Their...
Mohammad Waqas S.
Biotechnologist and programmer
5.0 out of 5

"Seamless and easy to use Hosting Solution for Web Applications"

From the moment I signed up, the process has been seamless and straightforward...
Mohana R.
Senior Software Engineer
5.0 out of 5

"Availing Different DB Engine Services Provided by Hostman is Convenient for my Organization usecases"

Hostman manages the cloud operations...
Faizan A.
5.0 out of 5

"Hostman is a great fit for me"

Hostman is a great fit for me. What do you like best about Hostman? It was very easy to deploy my application and create database, I didn't have
Adam M.
5.0 out of 5

"Perfect website"

This website is extremely user friendly and easy to use. I had no problems so didn't have to contact customer support. Really good website and would recommend to others.
Anup K.
4.0 out of 5

"Simplifying Cloud Deployment with Strengths and Areas for Growth"

What I like best about Hostman is its unwavering commitment to simplicity...
Naila J.
5.0 out of 5

"Streamlined Deployment with Room for Improvement"

Hostman impresses with its user-friendly interface and seamless deployment process, simplifying web application hosting...

More cloud services from Hostman

See all Products

Latest News

Servers

Sentry: Error Tracking and Monitoring

Sentry is a platform for error logging and application monitoring. The data we receive in Sentry contains comprehensive information about the context in which an issue occurred, making it easier to reproduce, trace the root cause, and significantly assist in error resolution. It's a valuable tool for developers, testers, and DevOps professionals. This open-source project can be deployed on a private or cloud server. Originally, Sentry was a web interface for displaying traces and exceptions in an organized way, grouping them by type. Over time, it has grown, adding new features, capabilities, and integrations. It's impossible to showcase everything it can do in a single article fully, and even a brief video overview could take up to three hours. Official Website  Documentation  GitHub Why Use Sentry When We Have Logging? Reviewing logs to understand what's happening with a service is helpful. When logs from all services are centralized in one place, like Elastic, OpenSearch, or Loki, it’s even better. However, you can analyze errors and exceptions faster, more conveniently, and with greater detail in Sentry. There are situations when log analysis alone does not clarify an issue, and Sentry comes to the rescue. Consider cases where a user of your service fails to log in, buy a product, or perform some other action and leaves without submitting a support ticket. Such issues are extremely difficult to identify through logs alone. Even if a support ticket is submitted, analyzing, identifying, and reproducing such specific errors can be costly: What device and browser were used? What function triggered the error, and why? What specific error occurred? What data was on the front end, and what was sent to the backend? Sentry’s standout feature is the way it provides detailed contextual information about errors in an accessible format, enabling faster response and improved development. As the project developers claim on their website, “Your code will tell you more than what logs reveal. Sentry’s full-stack monitoring shows a more complete picture of what's happening in your service’s code, helping identify issues before they lead to downtime.” How It Works In your application code, you set up a DSN (URL) for your Sentry platform, which serves as the destination for reports (errors, exceptions, and logs). You can also customize, extend, or mask the data being sent as needed. Sentry supports JavaScript, Node, Python, PHP, Ruby, Java, and other programming languages. In the setup screenshot, you can see various project types, such as a basic Python project as well as Django, Flask, and FastAPI frameworks. These frameworks offer enhanced and more detailed data configurations for report submission. Usage Options Sentry offers two main usage options: Self-hosted (deployed on your own server) Cloud-based (includes a limited free version and paid plans with monthly billing) The Developer version is a free cloud plan suitable for getting acquainted with Sentry. For anyone interested in Sentry, we recommend at least trying the free cloud version, as it’s a good introduction. However, a self-hosted option is ideal since the cloud version can experience error reporting delays of 1 to 5 minutes, which may be inconvenient. Self-Hosted Version Installation Now, let's move on to the technical part. To deploy Sentry self-hosted, we need the getsentry/self-hosted repository. The platform will be set up using Docker Compose. System Requirements Docker 19.03.6+ Docker Compose 2.19.0+ 4 CPU cores 16 GB RAM 20 GB free disk space We’ll be using a VPS from Hostman with Ubuntu 22.04. System Setup Update Dependencies First, we need to update the system packages: apt update && apt upgrade -y Install Required Packages Docker Docker's version available in the repository is 24.0.7, so we’ll install it with: apt install docker.io Docker Compose The version offered by apt is 1.29.2-1, which does not match the required version. So we need to install in manully. We’ll get the latest version directly from the official repository: VERSION=$(curl --silent https://api.github.com/repos/docker/compose/releases/latest | grep -Po '"tag_name": "\K.*\d')DESTINATION=/usr/bin/docker-composesudo curl -L https://github.com/docker/compose/releases/download/${VERSION}/docker-compose-$(uname -s)-$(uname -m) -o $DESTINATIONsudo chmod 755 $DESTINATION Verify Docker Compose Installation To ensure everything is correctly installed, check the version of Docker Compose: docker-compose --version Output: Docker Compose version v2.20.3 Once these steps are completed, you can proceed with deploying Sentry using Docker Compose. Installation The Sentry developers have simplified the installation process with a script. Here's how to set it up: Clone the Repository and Release Branch First, clone the repository and checkout the release branch: git clone https://github.com/getsentry/self-hosted.gitcd self-hostedgit checkout 24.10.0 Run the Installation Script Start the installation process by running the script with the following flags: ./install.sh --skip-user-prompt --no-report-self-hosted-issues Flags explanation: --skip-user-prompt: Skips the prompt for creating a user (we’ll create the user manually, which can be simpler). --no-report-self-hosted-issues: Skips the prompt to send anonymous data to the Sentry developers from your host (this helps developers improve the product, but it uses some resources; decide if you want this enabled). The script will check system requirements and download the Docker images (docker pull). Start Sentry Once the setup is complete, you’ll see a message with the command to run Sentry: You're all done! Run the following command to get Sentry running:docker-compose up -d Run the command to start Sentry: docker-compose up -d The Sentry web interface will now be available at your host's IP address on port 9000. Before your first login, edit the ./sentry/config.yml configuration file and the line: system.url-prefix: 'http://server_IP:9000' And restart the containers: docker-compose restart Create a User We skipped the user creation during the installation, so let’s create the user manually. Run: docker-compose run --rm web createuser Enter your email, password, and answer whether you want to give the user superuser privileges. Upon first login, you’ll see an initial setup screen where you can specify: The URL for your Sentry instance. Email server settings for sending emails. Whether to allow other users to self-register. At this point, Sentry is ready to use. You can read more about the configuration here. Configuration Files Sentry’s main configuration files include: .env./sentry/config.yml./sentry/sentry.conf.py By default, 42 containers are launched, and we can customize settings in the configuration files. Currently, it is not possible to reduce the number of containers due to the complex architecture of the system.  You can modify the .env file to disable some features. For example, to disable the collection of private statistics, add this line to .env: SENTRY_BEACON=False You can also change the event retention period. By default, it is set to 90 days: SENTRY_EVENT_RETENTION_DAYS=90 Database and Caching Project data and user accounts are stored in PostgreSQL. If needed, you can easily configure your own database and Redis in the configuration files. HTTPS Proxy Setup To access the web interface securely, you need to set up an HTTPS reverse proxy. The Sentry documentation does not specify a particular reverse proxy, but you can choose any that fits your needs. After configuring your reverse proxy, you will need to update the system.url-prefix in the config.yml file and adjust the SSL/TLS settings in sentry/sentry.conf.py. Project Setup and Integration with Sentry To set up and connect your first project with Sentry, follow these steps: Create a New Project In the Sentry web interface, click Add New Project and choose your platform. After creating the project, Sentry will generate a unique DSN (Data Source Name), which you'll need to use in your application to send events to Sentry. Configure the traces_sample_rate Pay attention to the traces_sample_rate setting. It controls the percentage of events that are sent to Sentry. The default value is 1.0, which sends 100% of all events.  traces_sample_rate=1.0  # 100% of events will be sent If you set it to 0.25, it will only send 25% of events, which can be useful to avoid overwhelming the platform with too many similar errors. You can adjust this value depending on your needs. You can read more about additional parameters of the sentry_sdk in the official documentation. Example Code with Custom Exception Here’s an example script that integrates Sentry with a custom exception and function: import sentry_sdk sentry_sdk.init( dsn="http://[email protected]:9000/3", # DSN from project creation traces_sample_rate=1.0, # Send 100% of events environment="production", # Set the runtime environment release="my-app-1.0.0", # Specify the app version send_default_pii=True, # Send Personally Identifiable Information (PII) ) class MyException(Exception): pass def my_function(user, email): raise MyException(f"User {user} ({email}) encountered an error.") def create_user(): print("Creating a user...") my_function('James', '[email protected]') if __name__ == "__main__": sentry_sdk.capture_message("Just a simple message") # Send a test message to Sentry create_user() # Simulate the error Run the Script Run the Python script: python main.py This script will: Initialize Sentry with your project’s DSN. Capture a custom exception when calling my_function. Send an example message to Sentry. Check Results in Sentry After running the script, you should see the following in Sentry: The Just a simple message message will appear in the event stream. The MyException that is raised in my_function will be captured as an error, and the details of the exception will be logged. You can also view the captured exception, including the user information (user and email) and any other data you choose to send (such as stack traces, environment, etc.). In Sentry, the tags displayed in the error reports include important contextual information that can help diagnose issues. These tags often show: Environment Variable: This indicates the runtime environment of the application, such as "production", "development", or "staging". It helps you understand which environment the error occurred in. Release Version: The version of your application that was running when the error occurred. This is particularly useful for identifying issues that might be specific to certain releases or versions of the application. Hostname: The name of the server or machine where the error happened. This can be helpful when working in distributed systems or multiple server environments, as it shows the exact server where the issue occurred. These tags appear in the error reports, providing valuable context about the circumstances surrounding the issue. For example, the stack trace might show which functions were involved in the error, and these tags can give you additional information, such as which version of the app was running and on which server, making it easier to trace and resolve issues. Sentry automatically adds these contextual tags, but you can also customize them by passing additional information when you capture errors, such as environment, release version, or user-related data. Conclusion In this article, we discussed Sentry and how it can help track errors and monitor applications. We hope it has sparked your interest enough to explore the documentation or try out Sentry. Despite being a comprehensive platform, Sentry is easy to install and configure. The key is to carefully manage errors and group events and use flexible configurations to avoid chaos. When set up properly, Sentry becomes a powerful and efficient tool for development teams, offering valuable insights into application behavior and performance.
15 November 2024 · 10 min to read
Ubuntu

How to Install VNC on Ubuntu

If you need to interact with a remote server through a graphical interface, you can use VNC technology.VNC (Virtual Network Computing) allows users to establish a remote connection to a server over a network. It operates on a client-server architecture and uses the RFB protocol to transmit screen images and input data from various devices (such as keyboards or mice). VNC supports multiple operating systems, including Ubuntu, Windows, macOS, and others. Another advantage of VNC is that it allows multiple users to connect simultaneously, which can be useful for collaborative work on projects or training sessions. In this guide, we will describe how to install VNC on Ubuntu, using a Hostman cloud server with Ubuntu 22.04 as an example. Step 1: Preparing to Install VNC Before starting the installation process on both the server and the local machine, there are a few prerequisites to review.  Here is a list of what you’ll need to complete the installation: A Server Running Ubuntu 22.04. In this guide, we will use a cloud server from Hostman with minimal hardware configuration. A User with sudo Privileges. You should perform the installation as a regular user with administrative privileges. Select a Graphical Interface. You’ll need to choose a desktop environment that you will use to interact with the remote server after installing the system on both the server and the local machine. A Computer with a VNC Client Installed.  Currently, the only way to communicate with a rented server running Ubuntu 22.04 is through the console. To enable remote management via a graphical interface, you’ll need to install a desktop environment along with VNC on the server. Below are lists of available VNC servers and desktop environments that can be installed on an Ubuntu server. VNC Servers: TightVNC Server. One of the most popular VNC servers for Ubuntu. It is easy to set up and offers good performance. RealVNC Server. RealVNC provides a commercial solution for remote access to servers across various Linux distributions, including Ubuntu, Debian, Fedora, Arch Linux, and others. Desktop Environments: Xfce. A lightweight and fast desktop environment, ideal for remote sessions over VNC. It uses fewer resources than heavier desktop environments, making it an excellent choice for servers and virtual machines. GNOME. The default Ubuntu desktop environment, offering a modern and user-friendly interface. It can be used with VNC but will consume more resources than Xfce. KDE Plasma. Another popular desktop environment that provides a wide range of features and a beautiful design. The choice of VNC server and desktop environment depends on the user’s specific needs and available resources. TightVNC and Xfce are excellent options for stable remote sessions on Ubuntu, as they do not require high resources. In the next step, we will describe how to install them on the server in detail. Step 2: Installing the Desktop Environment and VNC Server To install the VNC server on Ubuntu along with the desktop environment, connect to the server and log in as a regular user with administrative rights. Update the Package List  After logging into the server, run the following command to update the packages from the connected repositories: sudo apt update Install the Desktop Environment  Next, install the previously selected desktop environment. To install Xfce, enter: sudo apt install xfce4 xfce4-goodies Here, the first package provides the basic Xfce desktop environment, while the second includes additional applications and plugins for Xfce, which are optional. Install the TightVNC Server  To install TightVNC, enter: sudo apt install tightvncserver Start the VNC Server  Once the installation is complete, initialize the VNC server by typing: vncserver This command creates a new VNC session with a specific session number, such as :1 for the first session, :2 for the second, and so on. This session number corresponds to a display port (for example, port 5901 corresponds to :1). This allows multiple VNC sessions to run on the same machine, each using a different display port. During the first-time setup, this command will prompt you to set a password, which will be required for users to connect to the server’s graphical interface. Set the View-Only Password (Optional)  After setting the main password, you’ll be prompted to set a password for view-only mode. View-only mode allows users to view the remote desktop without making any changes, which is helpful for demonstrations or when limited access is needed. If you need to change the passwords set above, use the following command: vncpasswd Now you have a VNC session. In the next step, we will set up VNC to launch the Ubuntu server with the installed desktop environment. Step 3: Configuring the VNC Server The VNC server needs to know which desktop environment it should connect to. To set this up, we’ll need to edit a specific configuration file. Stop Active VNC Instances  Before making any configurations, stop any active VNC server instances. In this guide, we’ll stop the instance running on display port 5901. To do this, enter: vncserver -kill :1 Here, :1 is the session number associated with display port 5901, which we want to stop. Create a Backup of the Configuration File  Before editing, it’s a good idea to back up the original configuration file. Run: mv ~/.vnc/xstartup ~/.vnc/xstartup.bak Edit the Configuration File  Now, open the configuration file in a text editor: nano ~/.vnc/xstartup Replace the contents with the following: #!/bin/bashxrdb $HOME/.Xresourcesstartxfce4 & #!/bin/bash – This line is called a "shebang," and it specifies that the script should be executed using the Bash shell. xrdb $HOME/.Xresources – This line reads settings from the .Xresources file, where desktop preferences like colors, fonts, cursors, and keyboard options are stored. startxfce4 & – This line starts the Xfce desktop environment on the server. Make the Configuration File Executable To allow the configuration file to be executed, use: chmod +x ~/.vnc/xstartup Start the VNC Server with Localhost Restriction Now that the configuration is updated, start the VNC server with the following command: vncserver -localhost The -localhost option restricts connections to the VNC server to the local host (the server itself), preventing remote connections from other machines. You will still be able to connect from your computer, as we’ll set up an SSH tunnel between it and the server. These connections will also be treated as local by the VNC server. The VNC server configuration is now complete. Step 4: Installing the VNC Client and Connecting to the Server Now, let’s proceed with installing a VNC client. In this example, we’ll install the client on a Windows 11 computer. Several VNC clients support different operating systems. Here are a few options:  RealVNC Viewer. The official client from RealVNC, compatible with Windows, macOS, and Linux. TightVNC Viewer. A free and straightforward VNC client that supports Windows and Linux. UltraVNC. Another free VNC client for Windows with advanced remote management features. For this guide, we’ll use the free TightVNC Viewer. Download and Install TightVNC Viewer Visit the official TightVNC website, download the installer, and run it. In the installation window, click Next and accept the license agreement. Then, select the custom installation mode and disable the VNC server installation, as shown in the image below. Click Next twice and complete the installation of the VNC client on your local machine. Set Up an SSH Tunnel for Secure Connection To encrypt your remote access to the VNC server, use SSH to create a secure tunnel. On your Windows 11 computer, open PowerShell and enter the following command: ssh -L 56789:localhost:5901 -C -N -l username server_IP_address Make sure that OpenSSH is installed on your local machine; if not, refer to Microsoft’s documentation to install it. This command configures an SSH tunnel that forwards the connection from your local computer to the remote server over a secure connection, making VNC believe the connection originates from the server itself. Here’s a breakdown of the flags used: -L sets up SSH port forwarding, redirecting the local computer’s port to the specified host and server port. Here, we choose port 56789 because it is not bound to any service. -C enables compression of data before transmitting over SSH. -N tells SSH not to execute any commands after establishing the connection. -l specifies the username for connecting to the server. Connect with TightVNC Viewer After creating the SSH tunnel, open the TightVNC Viewer and enter the following in the connection field: localhost:56789 You’ll be prompted to enter the password created during the initial setup of the VNC server. Once you enter the password, you’ll be connected to the VNC server, and the Xfce desktop environment should appear. Stop the SSH Tunnel To close the SSH tunnel, return to the PowerShell or command line on your local computer and press CTRL+C. Conclusion This guide has walked you through the step-by-step process of setting up VNC on Ubuntu 22.04. We used TightVNC Server as the VNC server, TightVNC Viewer as the client, and Xfce as the desktop environment for user interaction with the server. We hope that using VNC technology helps streamline your server administration, making the process easier and more efficient.
15 November 2024 · 8 min to read
Servers

How to Install Mattermost on Ubuntu

Mattermost is a messaging and collaboration platform that can be installed on self-hosted servers or in the cloud. It serves as an alternative to messengers like Slack and Rocket.Chat. In this guide, we will review the Free plan, which includes unlimited message history and group calls (for more details on pricing plans, see the official website). Mattermost clients are available for mobile (iOS, Android) and desktop (Windows, Linux, Mac), and there’s also a browser-based version. Only the Self-Hosted Mattermost version is available under the Free plan;  We will go through the installation on Ubuntu. Other installation methods (including a Docker image) are available in the official docs. Technical Requirements For 1,000 users, a minimum configuration of 1 CPU, 2 GB RAM, and PostgreSQL v11+ or MySQL 8.0.12+ is required. We will use the following resources: For PostgreSQL 16: We'll provision a DBaaS with 1 CPU, 1 GB RAM, and 20 GB of disk space. For Mattermost: We'll provision a server running Ubuntu with 2 CPUs, 2 GB RAM, and 60 GB of disk space. We will also need to restrict access to the database. We will do it by setting up a private network in Hostman. Environment Setup Creating a Private Network To restrict database access, we can use Firewall, but in this setup, all services will be within the same network.  Important: Services must be located in the same region to operate within a single network. Database We'll provision the database as a service with the following configuration: 1 CPU, 1 GB RAM, and 20 GB of disk space, hosted in Poland. While creating the database, in the Network section, select the No external IP option and the network created in the previous step. The default database is default_db, and the user is gen_user. Server for Mattermost Next, we need to set up a server for Mattermost and Nginx. This server will run Ubuntu 22.04 and will be hosted in Poland. For the configuration, we need at least 2 CPUs, 2 GB RAM, and 50 GB of disk space, so we will choose a close enough plan: You can also select the exact parameters (2 CPUs, 2 GB RAM, 50 GB) by using the Custom tab, but it will be more expensive. As with the PostgreSQL setup, select the previously created network in the Network step. Create the server. Domain We will also need a domain to obtain a TLS certificate. In this guide, we will use example.com. You can add your domain in the Domains → Add domain section in the Hostman control panel.  Ensure the domain is linked to the server. You can verify this in the Network section. If the domain is not listed next to the IP address, it can be added manually through the Set Up Reverse Zone option. Installing Mattermost Now that the environment is ready, we can proceed with installing Mattermost. To begin, we’ll connect to the repository at deb.packages.mattermost.com/repo-setup.sh: curl -o- https://deb.packages.mattermost.com/repo-setup.sh | sudo bash -s mattermost Here, the mattermost argument is passed to sudo bash -s mattermost to add only the Mattermost repository. If no argument is provided, the script’s default all argument will add repositories for Mattermost, Nginx, PostgreSQL, and Certbot. Installing the Service The Mattermost service will install to /opt/mattermost, with a mattermost user and group created automatically: sudo apt update sudo apt install mattermost -y After installation, create a config.json file with the necessary permissions, based on the config.defaults.json file. Read and write access should be granted only to the owner (in this case, the mattermost user): sudo install -C -m 600 -o mattermost -g mattermost /opt/mattermost/config/config.defaults.json /opt/mattermost/config/config.json Configuring Mattermost Open config.json to fill in key parameters: sudo nano /opt/mattermost/config/config.json Set the following: SiteURL: Enter the created domain with the https protocol in the ServiceSettings block, which will be linked with an SSL certificate later. "ServiceSettings": { "SiteURL": "https://example.com", "WebsocketURL": "" } DriverName: Ensure this is set to postgres in the SqlSettings block. DataSource: Provide the username, password, host, and database name in the connection link in the SqlSettings block. Other configurations are optional for the initial launch and can be modified later in the Mattermost administrative console. Starting Mattermost Start the Mattermost service: sudo systemctl start mattermost To verify that Mattermost started successfully: sudo systemctl status mattermost.service And verify it is accessible on port 8065. If the site doesn’t open, check the firewall settings. You can also verify local access to port 8065 directly from the server: curl -v localhost:8065 Enabling Auto-Start Finally, enable Mattermost to start automatically on boot: sudo systemctl enable mattermost.service With these steps, Mattermost should be up and running and ready for further configuration and usage. Setting Up Nginx as a Reverse Proxy for Mattermost We will set up Nginx as a reverse proxy to prevent direct access on port 8065, which will be closed later via firewall. Install Nginx: sudo apt install nginx Create the Nginx Configuration File: sudo nano /etc/nginx/sites-available/mattermost Nginx Configuration for Mattermost: Add the following configuration, replacing example.com with your actual domain name. This configuration proxies both HTTP and WebSocket protocols. upstream backend { server 127.0.0.1:8065; keepalive 32; } proxy_cache_path /var/cache/nginx levels=1:2 keys_zone=mattermost_cache:10m max_size=3g inactive=120m use_temp_path=off; server { listen 80; server_name example.com; location ~ /api/v[0-9]+/(users/)?websocket$ { proxy_set_header Upgrade $http_upgrade; proxy_set_header Connection "upgrade"; client_max_body_size 50M; proxy_set_header Host $http_host; proxy_set_header X-Real-IP $remote_addr; proxy_set_header X-Forwarded-For $proxy_add_x_forwarded_for; proxy_set_header X-Forwarded-Proto $scheme; proxy_set_header X-Frame-Options SAMEORIGIN; proxy_buffers 256 16k; proxy_buffer_size 16k; client_body_timeout 60; send_timeout 300; lingering_timeout 5; proxy_connect_timeout 90; proxy_send_timeout 300; proxy_read_timeout 90s; proxy_pass http://backend; } location / { client_max_body_size 50M; proxy_set_header Connection ""; proxy_set_header Host $http_host; proxy_set_header X-Real-IP $remote_addr; proxy_set_header X-Forwarded-For $proxy_add_x_forwarded_for; proxy_set_header X-Forwarded-Proto $scheme; proxy_set_header X-Frame-Options SAMEORIGIN; proxy_buffers 256 16k; proxy_buffer_size 16k; proxy_read_timeout 600s; proxy_cache mattermost_cache; proxy_cache_revalidate on; proxy_cache_min_uses 2; proxy_cache_use_stale timeout; proxy_cache_lock on; proxy_http_version 1.1; proxy_pass http://backend; } } Create a symbolic link to enable the Mattermost configuration: sudo ln -s /etc/nginx/sites-available/mattermost /etc/nginx/sites-enabled/mattermost Remove the default configuration: sudo rm -f /etc/nginx/sites-enabled/default Restart the Nginx service to apply the changes: sudo service nginx restart Setting Up SSL with Let’s Encrypt: Use Certbot to obtain an SSL certificate for your domain. Certbot will automatically configure Nginx for HTTPS. sudo apt install python3-certbot-nginx && certbot Certbot will prompt you to enter your email and domain name and then add the certificate to your domain. After installing the certificate, Certbot will update the Nginx configuration file to include: A listen directive for handling requests on port 443 (HTTPS) SSL keys and configuration directives A redirect from HTTP to HTTPS With this setup complete, Mattermost should be accessible over HTTPS on your domain. Nginx will handle HTTP to HTTPS redirection, and secure connections will be established using the SSL certificate from Let’s Encrypt. Setting Up Firewall Now, go to your Mattermost server page in the Hostman control panel. Open the Network tab to add firewall rules. We will allow incoming TCP requests to ports 22 for SSH access, and 80 and 443 for TCP.  To collect metrics on the server dashboard, port 10050 also needs to be open; the list of IP addresses that require access to this port can be found in /etc/zabbix/zabbix_agentd.conf. First Launch Now you can Mattermost at https://your_domain/. You can create an account and workspace directly in the browser. After installation and on the first login, you may encounter an issue with WebSocket connectivity. To solve it, check the configuration. You can do it in the System Console. Out-of-the-box features include calls, playbooks, a plugin marketplace, and GitLab authentication. Additionally, Mattermost offers excellent documentation. Conclusion In this guide, we deployed the free self-hosted version of Mattermost on Hostman servers with a dedicated database accessible only from the internal network. Keep in mind that we allocated the server resources for a general scenario, so you may need additional resources. It’s advisable not to skip load testing! As a next step, I recommend connecting an S3 storage, also available on Hostman.
14 November 2024 · 8 min to read
Ubuntu

How To Install Webmin on Ubuntu 24.04

Managing a Linux server can be challenging, particularly when dealing with standard duties like system monitoring, service configuration, and user administration. Despite its strength, command-line management necessitates knowledge of Linux commands and setups, which might be difficult for novice admins. Webmin offers a solution that simplifies these tasks and makes server management possible even for people without a lot of Linux experience thanks to its intuitive, web-based user interface. This article offers a thorough, step-by-step tutorial that starts with the required package updates and progresses through the installation of dependencies, repository settings, and secure access setup. Every component has been thoughtfully created to guarantee that customers fully comprehend the installation procedure as well as the security issues at play.. After the successful installation of Webmin, a versatile and user-friendly tool will be available to readers to manage their Ubuntu server directly from a web browser. Webmin gives users the ability to easily and effectively utilize critical server administration activities, such as setting up network services, creating and maintaining user accounts, and keeping an eye on system health. Even with little knowledge of Linux command-line interfaces, users may confidently manage servers by following this guide, which will enable users to make the most of the Linux environment. Prerequisites The requirements to install Webmin on Ubuntu 24.04 are as follows: A local computer or a cloud server with Ubuntu 24.04 installed A regular user with sudo access. Since installing Webmin requires downloading packages from external repositories, make sure the server has access to the internet. Make a new DNS record with a subdomain that points to the IP address of the server that hosts it. Take mywebmin.mydomain.com, for instance. Install Webmin Here are the step-by-step instructions for installing Webmin on Ubuntu 24.04. It is advised to upgrade any outdated packages and update the system's package lists first. This guarantees a trouble-free installation of Webmin and its dependencies. Execute the subsequent commands: sudo apt update && sudo apt upgrade -y Add Webmin repository. Users must manually add the Webmin repository because it is not part of the official Ubuntu repositories. Get the Webmin repository's GPG key by running the command below. wget -qO - http://www.webmin.com/jcameron-key.asc | sudo apt-key add - Include the Webmin repository to the system’s sources list. sudo sh -c 'echo "deb http://download.webmin.com/download/repository sarge contrib" > /etc/apt/sources.list.d/webmin.list' To establish the newly added repository, refresh the package list after adding it. sudo apt update Install Webmin now using: sudo apt install webmin -y After installation is finished, you can use a web browser to access Webmin. Open the web browser and navigate to this page: http://<server-ip>:10000 In our case, the IP address is 166.1.227.224: http://166.1.227.224:10000 Secure Webmin Update the SSL Webmin configuration. For encrypted connections, Webmin uses SSL by default; however, users must confirm this configuration. Open the Webmin configuration file in order to verify or enable SSL. Run the command below. sudo nano /etc/webmin/miniserv.conf Search the line with port=10000 and change it to another port. For example: Save your modifications and restart Webmin. sudo systemctl restart webmin Restricting access to specific IP addresses improves security by restricting the devices that can access Webmin. In order to view or change the allowed IPs, open the Webmin startup file and run the command below. sudo nano /etc/webmin/miniserv.conf In order to include only trusted IP addresses, change the allow= line. If it doesn’t exist yet, add it. allow=your_trusted_ip The actual IP address should be substituted for your_trusted_ip. One can add more than one address, with spaces between them. Restart Webmin after saving the file. sudo systemctl restart webmin Set Up Firewall Rules If a firewall is present, configure it; Webmin uses port 10000 by default. If the system has a firewall installed, such as UFW, grant Webmin access with the following steps. Check Firewall Status First, confirm that the UFW firewall is active. Run the following command to view the current status. sudo ufw status If the firewall isn't yet activated, use the command ufw enable to turn it on., but make sure to allow SSH service first to prevent the current session from terminating and being able to SSH to the server again. To allow the SSH service, run the following command.  sudo ufw allow ssh Run the following command to activate the firewall.  sudo ufw enable By default, Webmin uses port 10000. To allow traffic on this port, use the following command. sudo ufw allow 10000/tcp If Webmin is configured to use a custom port, try using a different port number instead of 10000. Grant access, for example, by using the following command  if Webmin is to set up on port 22000. sudo ufw allow 22000/tcp Limit Individual IP addresses' access. Increase Webmin's security by configuring the firewall to only allow access from specific, verified IP addresses. To limit access to 192.168.1.100, for example, run the command below. sudo ufw allow from 192.168.1.100 to any port 10000 proto tcp Repeat this command for each additional IP address that requires access. To ensure that the changes take effect when the rules are specified, reload UFW by running the following command. sudo ufw reload Check the firewall's status once again to ensure that the rules are in place. sudo ufw status Access Webmin Launch any current web browser, such Edge, Firefox, or Chromeweb, to access the Webmin interface after installing Webmin and setting up firewall rules. Enter the IP address of the server in the address bar, then Webmin's port (10000 by default or your custom port if you reconfigured): https:/<server-ip>/:10000. For example: https://166.1.227.224:10000 Because Webmin's default SSL certificate is self-signed, the browser can show a security warning if it is applied. Users should choose "Accept the Risk" or "Proceed to Site" in order to continue to Webmin. Enter the root username and password of the server, or any other account with sudo rights, to access the dashboard once the Webmin login screen is displayed. After successfully logging in, users will be taken to the Webmin dashboard, where they may manage users, monitor services, adjust settings, access a variety of system administration tools, and perform any other tasks related to administration on the Ubuntu server. Conclusion In conclusion, setting up Webmin on Ubuntu 24.04 offers a stable, intuitive interface for handling server responsibilities, enabling system management to be used by both inexperienced and seasoned users. Users may easily install, secure, and use Webmin by following this guide. This gives them the power to manage users, services, firewall settings, and more from a single online interface. By enabling administrators to carry out necessary operations in a convenient and efficient manner, Webmin improves server management efficiency and security.
14 November 2024 · 6 min to read
Servers

Caddy: A Lightweight Reverse Proxy Server

Caddy is a reverse proxy server written in Go. It is a completely free, open-source project with an Apache 2.0 license. Caddy supports HTTP/2, HTTP, and HTTPS, and allows for automatic obtaining and renewing of Let’s Encrypt certificates. It is cross-platform and supports various processor architectures. Additionally, you can run Caddy in a Docker container. Official website GitHub page Documentation Caddy Key Features Simple and intuitive configuration: The configuration file is easy to read and write, and is minimalist. Automatic obtaining and renewing of SSL certificates. Default HTTPS usage. Configuration via API: You can configure Caddy using REST API requests in JSON format, which makes it ideal for automation setups and provides additional configuration possibilities. Plugins: Caddy works out of the box with a basic set of features, including a proxy server adapter, but with plugins, you can add extra functions: page authentication, integration with DNS providers (like Cloudflare), and more. Installing Caddy In this guide, we will use a cloud server with Ubuntu 22.04 and minimal configuration. Connect to the server and install Caddy according to the official documentation: sudo apt install -y debian-keyring debian-archive-keyring apt-transport-httpscurl -1sLf 'https://dl.cloudsmith.io/public/caddy/stable/gpg.key' | sudo gpg --dearmor -o /usr/share/keyrings/caddy-stable-archive-keyring.gpgcurl -1sLf 'https://dl.cloudsmith.io/public/caddy/stable/debian.deb.txt' | sudo tee /etc/apt/sources.list.d/caddy-stable.listsudo apt updatesudo apt install caddy Check the service status: systemctl status caddy Check the version: caddy version # Output:v2.7.4 To verify, open the page in your browser using the host's IP address. Next, follow the step-by-step configuration recommendations provided by Caddy. Caddy Configuration Step 1. Create a domain name and point it to the server's IP address Create a third-level domain name. For this example, we will use caddy.example.com.  Set the A record to point to the public IP address of the created server. Step 2. Change the path and use your static files for display Create your own index.html at the specified path /var/www/html/. Add an image, for example, image.jpg: <!DOCTYPE html> <head> <meta charset="UTF-8"> <title>Header</title> </head> <body> <header> <h1>Simple index file for demo</h1> </header> <main> <h2>Caddy checklist</h2> <p>Let's configure Caddy following the instructions:</p> <ul> <li>Set the A record</li> <li>Upload files</li> <li>Edit Caddyfile</li> <li>Reload configuration</li> <li>Visit the site</li> </ul> <img src="image.jpg" alt="new_image"> </main> </body> </html> Step 3. In the configuration, change port :80 to your domain name Install nano: sudo apt install nano Open the configuration file for editing: nano /etc/caddy/Caddyfile Remove all the content and the following lines: caddy.example.com {    root * /var/www/html    file_server} Step 4. Restart Caddy Restart Caddy using the command: systemctl reload caddy Open the page using your domain: caddy.example.com. The page will load immediately over HTTPS with a trusted certificate — all of this in just four lines of configuration, keeping everything minimal, clean, and understandable. Running Caddy in Docker Compose Suppose you need to isolate the service and redirect traffic. Using containers without installing additional packages or dependencies is very convenient, and starting everything with a single command. Therefore, let’s stop the Caddy service and install Docker: systemctl stop caddyapt remove caddyapt install docker.io docker-compose Now we repeat the same steps as before, but now in the container.  Create a directory at /srv/caddy and copy the static files and configuration files there: mkdir -p /srv/caddy/sitecp -r /var/www/html /srv/caddy/sitecp /etc/caddy/Caddyfile /srv/caddy/Caddyfile Create a docker-compose.yml file with the following configuration: version: '3.8' services: caddy: image: caddy:2.7.4 restart: always ports: - 80:80 - 443:443 volumes: - ./Caddyfile:/etc/caddy/Caddyfile - ./site:/var/www/html Here, we use volumes to transfer the files to the familiar directories, ensuring nothing is saved in the configuration. After this, run: docker-compose up -d Let's look at how we can further secure the page using BasicAuth with just a few configuration lines. Edit the Caddyfile as follows, adding basicauth * {login-password}: caddy.example.com { basicauth * { image $2y$10$v8t9CqkLFEon3UTYKUsRs.8zhMMLFX5.9WyDERzd7ESRT75PICkiW } root * /var/www/html file_server } You can generate the login and password in the console or use online .htpasswd generators (the default algorithm is bcrypt). Then, restart with: docker-compose restart Now, when you open the page, authentication windows will appear. Next, in docker-compose, let’s use a service with a web interface, such as Grafana. version: '3.8' caddy: image: caddy:2.7.4 restart: always ports: - 80:80 - 443:443 volumes: - ./Caddyfile:/etc/caddy/Caddyfile - ./site:/var/www/html grafana: image: grafana/grafana:10.0.5-ubuntu container_name: grafana # ports: # - 3000:3000 environment: GF_SECURITY_ADMIN_USER: 'admin' GF_SECURITY_ADMIN_PASSWORD: 'admin' The ports are commented out because both Grafana and Caddy are connected to the same group and can communicate by service names, so external port forwarding is not needed. If you need to access the service not only by the domain name but also by the local IP address and port, you will need to uncomment those lines. For the Grafana service, create another third-level domain name in DNS, for example, test.example.com, and add it to the Caddyfile configuration: caddy.example.com { root * /var/www/html file_server } test.example.com { reverse_proxy grafana:3000 } So far we have the following structure: In the site directory, there are two files: index.html (the main page of the site). image.jpg. The docker-compose.yml file starts two services: Caddy for proxying and obtaining certificates. Grafana as a separate web application. In the Caddyfile (the configuration file), using volumes, we share the internal container to /etc/caddy/Caddyfile. When accessing caddy.example.com, we get static files from the site directory. Accessing test.example.com forwards requests to Grafana. To check that the new domain name is resolving correctly on this host, verify the DNS records: nslookup test.example.com If everything works, you can check it in a browser. Go to test.example.com — it should open the Grafana login page. Conclusion In this article, we provided simple examples, but you can also read in the documentation about load balancing to distribute traffic across different hosts, adding health checks to verify the availability of hosts, how to trim, add, or modify headers in requests, etc. We don't dive too deeply into the configuration, as Caddy is primarily about simplicity. The configurations shown in the article are very convenient and clear, and you might think there can't be anything simpler. But it turns out, there is. For example, if on the same cloud machine we needed to deploy just Grafana, obtain a certificate, and secure it behind a proxy server, the Caddyfile configuration would look like this: test.example.comreverse_proxy grafana:3000 With just two lines in the source, we get a full-fledged proxy server, with HTTP-to-HTTPS redirection and automatic SSL certificate generation. This is exactly why we like Caddy.
13 November 2024 · 7 min to read
Wordpress

How to Install WordPress with Nginx and Let’s Encrypt SSL on Ubuntu

WordPress is a simple, popular, open-source, and free CMS (content management system) for creating modern websites. Today, WordPress powers nearly half of the websites worldwide. However, having just a content management system is not enough. Modern websites require an SSL certificate, which provides encryption and allows using a secure HTTPS connection. This short guide will show how to install WordPress on a cloud server, perform initial CMS configuration, and add an SSL certificate to the completed site, enabling users to access the website via HTTPS. The Nginx web server will receive user requests and then proxied to WordPress for processing and generating response content. A few additional components are also needed: a MySQL database, which serves as the primary data storage in WordPress, and PHP, which WordPress is written in. This technology stack is known as LEMP: Linux, Nginx, MySQL, PHP. Step 1. Creating the Server First, you will need a cloud server with Ubuntu 22.04 installed. Go to the Hostman control panel. Select the Cloud servers tab on the left side of the control panel. Click the Create button. You’ll need to configure a range of parameters that ultimately determine the server rental cost. The most important of these parameters are: The operating system distribution and its version (in our case, Ubuntu 22.04). Data center location. Physical configuration. Server information. Once all the data is filled in, click the Order button. Upon completion of the server setup, you can view the IP address of the cloud server in the Dashboard tab, and also copy the command for connecting to the server via SSH along with the root password: Next, open a terminal in your local operating system and connect via SSH with password authentication: ssh root@server_ip Replace server_ip with the IP address of your cloud server. You will then be prompted to enter the password, which you can either type manually or paste from the clipboard. After connecting, the terminal will display information about the operating system. Now you can create a user with sudo priviliges or keep using root. Step 2. Updating the System Before beginning the WordPress installation, it’s important to update the list of repositories available through the APT package manager: sudo apt update -y It’s also a good idea to upgrade already installed packages to their latest versions: sudo apt upgrade -y Now, we can move on to downloading and installing the technology stack components required for running WordPress. Step 3. Installing PHP Let's download and install the PHP interpreter. First, add a specialized repository that provides up-to-date versions of PHP: sudo add-apt-repository ppa:ondrej/php In this guide, we are using PHP version 8.3 in FPM mode (FastCGI Process Manager), along with an additional module to enable PHP’s interaction with MySQL: sudo apt install php8.3-fpm php-mysql -y The -y flag automatically answers “yes” to any prompts during the installation process. To verify that PHP is now installed on the system, you can check its version: php -v The console output should look like this: PHP 8.3.13 (cli) (built: Oct 30 2024 11:27:41) (NTS)Copyright (c) The PHP GroupZend Engine v4.3.13, Copyright (c) Zend Technologies    with Zend OPcache v8.3.13, Copyright (c), by Zend Technologies You can also check the status of the FPM service: sudo systemctl status php8.3-fpm In the console output, you should see a green status indicator: Active: active (running) Step 4. Installing MySQL The MySQL database is an essential component of WordPress, as it stores all site and user information for the CMS. Installation We’ll install the MySQL server package: sudo apt install mysql-server -y To verify the installation, check the database version: mysql --version If successful, the console output will look something like this: mysql  Ver 8.0.39-0ubuntu0.22.04.1 for Linux on x86_64 ((Ubuntu)) Also, ensure that the MySQL server is currently running by checking the database service status: sudo systemctl status mysql The console output should display a green status indicator: Active: active (running) MySQL Security This step is optional in this guide, but it’s worth mentioning. After installing MySQL, you can configure the database’s security settings: mysql_secure_installation This command will prompt a series of questions in the terminal to help you configure the appropriate level of MySQL security. Creating a Database Next, prepare a dedicated database specifically for WordPress. First, log in to MySQL: mysql Then, execute the following SQL command to create a database: CREATE DATABASE wordpress_database; You’ll also need a dedicated user for accessing this database: CREATE USER 'wordpress_user'@'localhost' IDENTIFIED BY 'wordpress_password'; Grant this user the necessary access permissions: GRANT ALL PRIVILEGES ON wordpress_database.* TO 'wordpress_user'@'localhost'; Finally, exit MySQL: quit Step 5. Downloading and Configuring Nginx The Nginx web server will handle incoming HTTP requests from users and proxy them to PHP via the FastCGI interface. Download and Installation We’ll download and install the Nginx web server using APT: sudo apt install nginx -y Next, verify that Nginx is indeed running as a service: systemctl status nginx In the console output, you should see a green status indicator: Active: active (running) You can also check if the web server is functioning correctly by making an HTTP request through a browser. Enter the IP address of the remote server in the address bar, where you are installing Nginx. For example: http://166.1.227.189 If everything is set up correctly, Nginx will display its default welcome page. For good measure, let’s add Nginx to the system’s startup list (though this is typically done automatically during installation): sudo systemctl enable nginx Now, you can proceed to make adjustments to the web server configuration. Configuration In this example, we’ll slightly modify the default Nginx configuration. For this, we need a text editor. We will use nano. sudo apt install nano Now open the configuration file: sudo nano /etc/nginx/sites-enabled/default If you remove all the comments, the basic configuration will look like this: server { listen 80 default_server; listen [::]:80 default_server; root /var/www/html; index index.html index.htm index.nginx-debian.html; server_name _; location / { try_files $uri $uri/ =404; } } To this configuration, we’ll add the ability to proxy requests to PHP through FastCGI: server { listen 80 default_server; listen [::]:80 default_server; root /var/www/html; # added index.php to index files index index.html index.htm index.nginx-debian.html index.php; # specify the domain name to obtain an SSL certificate later server_name mydomain.com www.mydomain.com; location / { # try_files $uri $uri/ =404; # direct root requests to /index.php try_files $uri $uri/ /index.php?$args; } # forward all .php requests to PHP via FastCGI location ~ \.php$ { include snippets/fastcgi-php.conf; fastcgi_pass unix:/run/php/php8.3-fpm.sock; } } Note that the server_name parameter should contain the domain name, with DNS settings including an A record that directs to the configured server with Nginx. Now, let’s check the configuration syntax for errors: sudo nginx -t If everything is correct, you’ll see a confirmation message in the console: nginx: the configuration file /etc/nginx/nginx.conf syntax is oknginx: configuration file /etc/nginx/nginx.conf test is successful Then, reload the Nginx service to apply the new configuration: sudo systemctl reload nginx Step 6. Installing an SSL Certificate To obtain an SSL certificate from Let’s Encrypt, we’ll use a special utility called Certbot. In this guide, Certbot will automate several tasks: Request the SSL certificate. Create an additional Nginx configuration file. Edit the existing Nginx configuration file (which currently describes the HTTP server setup). Restart Nginx to apply the changes. Obtaining the Certificate Like other packages, install Certbot via APT: sudo apt install certbotsudo apt install python3-certbot-nginx The first command installs Certbot, and the second adds a Python module for Certbot’s integration with Nginx. Alternatively, you can install python3-certbot-nginx directly, which will automatically include Certbot as a dependency: sudo apt install python3-certbot-nginx -y Now, let’s initiate the process to obtain and install the SSL certificate: sudo certbot --nginx First, Certbot will prompt you to register with Let’s Encrypt. You’ll need to provide an email address, agree to the Terms of Service, and optionally opt-in for email updates (you may decline this if desired). Then, enter the list of domain names, separated by commas or spaces, for which the certificate should be issued. Specify the exact domain names that are listed in the Nginx configuration file under the server_name directive: mydomain.com www.mydomain.com After the certificate is issued, Certbot will automatically configure it by adding the necessary SSL settings to the Nginx configuration file: listen 443 ssl; # managed by Certbot # RSA certificate ssl_certificate /etc/letsencrypt/live/example.com/fullchain.pem; # managed by Certbot ssl_certificate_key /etc/letsencrypt/live/example.com/privkey.pem; # managed by Certbot include /etc/letsencrypt/options-ssl-nginx.conf; # managed by Certbot # Redirect non-https traffic to https if ($scheme != "https") { return 301 https://$host$request_uri; } # managed by Certbot So, the complete Nginx configuration file will look as follows: server { listen 80 default_server; listen [::]:80 default_server; listen 443 ssl; # managed by Certbot # RSA certificate ssl_certificate /etc/letsencrypt/live/example.com/fullchain.pem; # managed by Certbot ssl_certificate_key /etc/letsencrypt/live/example.com/privkey.pem; # managed by Certbot include /etc/letsencrypt/options-ssl-nginx.conf; # managed by Certbot root /var/www/html; index index.html index.htm index.nginx-debian.html index.php; server_name domain.com www.domain.com; # Redirect non-https traffic to https if ($scheme != "https") { return 301 https://$host$request_uri; } # managed by Certbot location / { # try_files $uri $uri/ =404; # direct root requests to /index.php try_files $uri $uri/ /index.php?$args; } # forward all .php requests to PHP via FastCGI location ~ \.php$ { include snippets/fastcgi-php.conf; fastcgi_pass unix:/run/php/php8.3-fpm.sock; } } Automatic Certificate Renewal Let’s Encrypt certificates expire every 90 days, so they need to be renewed regularly. Instead of manually renewing them, you can set up an automated task. For this purpose, we’ll use Crontab, a scheduling tool in Unix-based systems that uses a specific syntax to define when commands should run. Install Crontab: sudo apt install cron And enable it: sudo systemctl enable cron Now open the Crontab file: crontab -e Add the following line to schedule the Certbot renewal command: 0 12 * * * /usr/bin/certbot renew --quiet In this configuration: The command runs at noon (12:00) every day. Certbot will check the certificate’s expiration status and renew it if necessary. The --quiet flag ensures that Certbot runs silently without generating output. Step 7. Downloading WordPress In this guide, we’ll use WordPress version 6.5.3, which can be downloaded from the official website: wget https://wordpress.org/wordpress-6.5.3.tar.gz Once downloaded, unpack the WordPress archive: tar -xvf wordpress-*.tar.gz After unpacking, you can delete the archive file: rm wordpress-*.tar.gz This will create a wordpress folder containing the WordPress files. Most core files are organized in the wp-content, wp-includes, and wp-admin directories. The main entry point for WordPress is index.php. Moving WordPress Files to the Web Server Directory You need to copy all files from the wordpress folder to the web server’s root directory (/var/www/html/) so that Nginx can serve the PHP-generated content based on user HTTP requests. Clear the existing web server directory (as it currently contains only the default Nginx welcome page, which we no longer need): rm /var/www/html/* Copy WordPress files to the web server directory: cp -R wordpress/* /var/www/html/ The -R flag enables recursive copying of files and folders. Set ownership and permissions. Ensure that Nginx can access and modify these files by setting the www-data user and group ownership, as well as appropriate permissions, for the WordPress directory: sudo chown -R www-data:www-data /var/www/html/sudo chmod -R 755 /var/www/html/ This allows Nginx to read, write, and modify WordPress files as needed, avoiding permission errors during the WordPress installation process. Step 8. Configuring WordPress WordPress configuration is managed through an intuitive web-based admin panel. No programming knowledge is necessary, though familiarity with languages like JavaScript, PHP, HTML, and CSS can be helpful for creating or customizing themes and plugins. Accessing the Admin Panel Open a web browser and go to the website using the domain specified in the Nginx configuration, such as: https://mydomain.com If all components were correctly set up, you should be redirected to WordPress’s initial configuration page: https://mydomain.com/wp-admin/setup-config.php Select Language: Choose your preferred language and click Continue. Database Configuration: WordPress will prompt you to enter database details. Click Let’s go! and provide the following information: Database Name: wordpress_database (from the previous setup) Database Username: wordpress_user Database Password: wordpress_password Database Host: localhost Table Prefix: wp_ (or leave as default) Click Submit. If the credentials are correct, WordPress will confirm access to the database. Run Installation: Click Run the installation. WordPress will then guide you to enter site and admin details: Site Title Admin Username Admin Password Admin Email Option to discourage search engine indexing (recommended for development/testing sites) Install WordPress: Click Install WordPress. After installation, you’ll be prompted to log in with the admin username and password you created. Accessing the Dashboard Once logged in, you'll see the WordPress Dashboard, which contains customizable widgets. The main menu on the left allows access to core WordPress functions, including: Posts and Pages for content creation Comments for moderating discussions Media for managing images and files Themes and Plugins for design and functionality Users for managing site members and roles Your WordPress site is now fully configured, and you can begin customizing and adding content as needed. Conclusion This guide showed how to install WordPress along with all its dependencies and how to connect a domain and add a SSL certificate from Let’s Encrypt to an already functioning website, enabling secure HTTPS connections with the remote server. The key dependencies required for WordPress to function include: PHP: The scripting language WordPress is written in. MySQL: The database system used by WordPress to store content and user data. Nginx (or Apache in other implementations): The web server that processes user requests initially. For more detailed information on managing site content through the WordPress admin panel, as well as creating custom themes and plugins, refer to the official WordPress documentation.
13 November 2024 · 13 min to read
Ubuntu

How to Install aaPanel on Ubuntu

aaPanel is an open-source solution that is used for monitoring and control over a server resource. It supports database, website, file, and security management, and many more features like WordPress, Docker, Logs, and Cron jobs management. This is the perfect solution if you are looking to have more control over your server. In this article, we will learn how to install aaPanel on Ubuntu and update and maintain it. Requirements aaPanel comes with minimal and recommended hardware requirements. The minimal requirements are the following: 1 core CPU 512MB RAM The recommended requirements are:  1 core CPU 1GB RAM You will also need to have at least 20 GB of space on the machine, and sudo or root permissions. This tutorial installs aaPanel Stable 7.0.11 on a Hostman cloud server with the following hardware characteristics: 1 x 3 GHz CPU • 1 GB RAM • 25 GB NVMe, running Ubuntu 22.04. Once these requirements are satisfied and you have set up your remote machine, we can download and install aaPanel. Download and Install aaPanel Installing aaPanel can be done using the installation script provided. First, ensure that the package source list is up to date and the existing packages are up to date. sudo apt update && sudo apt upgrade -y After that, download and install aaPanel: wget --no-check-certificate -O install_7.0_en.sh https://www.aapanel.com/script/install_7.0_en.shsudo bash install_7.0_en.sh This will prompt you to confirm the location of the installation. Enter y to continue. After the installation is done, you will see on your screen the URL to the aaPanel web interface, the username, and the password. The output will look like this: URL, username, and password Gather the URL, username, and password as they will be used to access the aaPanel. Access aaPanel Copy and paste the URL into your browser and you will have access to a similar page. Login page for the aaPanel dashboard Enter your login and password to access the dashboard homepage. You will have a modal confirming the installation of aaPanel. After closing the modal, aaPanel will recommend you to install essential software packages from LNMP or LAMP stack like Nginx, MySQL, PHPMyAdmin, and much more. You should choose the required ones and select other packages listed if any. For this tutorial, we are choosing the LNMP stack, but feel free to choose according to your requirements and needs. Installing software packages The installations can run in the background. On your homepage now, you have access to the dashboard and the numerous services aaPanel has to offer. aaPanel’s homepage With aaPanel installed, it is important to keep maintaining the software and update it regularly. Let’s see how we can achieve it. Update and Maintain aaPanel You can update and maintain aaPanel in many different ways. However, before updating your installation, you should ensure to have backups for services like databases in case things go wrong while updating for example, or any incident. Using the cron feature, you can create periodic tasks to backup files or services.  You have many options for backups so it is up to your requirements and needs.  aaPanel’s crons configuration Now that we can make backups, let’s see how to update aaPanel. Updating aaPanel aaPanel allows you to directly update the software from the dashboard. On the top right of the dashboard, you will find an update button. aaPanel’s Update button Clicking on this button may trigger the display of two different models. The first one will tell you that your software is up to date, but you can always try beta versions.  aaPanel’s current version modal The other modal will show you the new available version, with the changes, so you can update.  It is important to update aaPanel frequently, mostly to ensure security fixes are added to your installation as soon as possible.  Instead of using the dashboard, you can also make an update from the server shell. Downloading the script of the most recent version, and running the installation script will update aaPanel. curl -sSL https://www.aapanel.com/script/update_en.sh | sudo bash Maintaining aaPanel is not only about the updates and backups. It is also about security, monitoring, regular cleaning, and optimization.  Maintaining aaPanel To maintain aaPanel, you can follow the following recommendations.  1. Update Installed Packages and Services Regularly updating packages is key to maintaining a secure, compatible system. Go to aaPanel App Store to review and update applications (e.g., PHP, MySQL, Apache). Test critical updates in a staging environment before deploying to production. 2. Enable and Monitor Security Settings Configure security settings to safeguard your server against unauthorized access or make it more strong. Firewall: Set IP restrictions in aaPanel Security to control access, especially for SSH. SSL Certificates: Ensure certificates are valid and renew any expired ones in the SSL section. System Security: Set strong passwords for admin and database accounts. This can be done on the dashboard, in the global settings page.  Global settings page 3. Clean Up and Optimize Server Resources Regular cleanups and optimizations help maintain efficient performance and resource use. Remove Unused Files: Use File Manager to delete old backups, logs, and unneeded files. 4. Monitor Server Health The aaPanel Dashboard provides a comprehensive view of server health, displaying metrics such as CPU, memory, and disk usage. High usage in these areas can indicate processes that require optimization, resource-intensive applications, or potential security threats. Track CPU, memory, and disk usage in the aaPanel Dashboard. Set alerts in the panel to be notified about unusual resource usage. This can be done under the Alarm tab on the aaPanel global settings. aaPanel’s alarms For example, the configuration above allows us to be notified about some unexpected resource usage, via email or other applications. The alarm setting allows you to set configurations for the alarm modules. aaPanel’s alarms sources 5. Schedule Regular Maintenance Automate regular maintenance tasks to improve server reliability and manage resources. Automated Backups: Schedule backups for websites, databases, or files for reliable data recovery. Log Rotation: Configure log rotation to prevent logs from taking up excessive disk space. You can set a Cut log task in the cron tabs, for example, to compress logs regularly so they don’t become very large and difficult to analyze. Conclusion Installing and maintaining aaPanel on Ubuntu provides a powerful, secure, and user-friendly way to manage server resources and applications. From automated backups and package updates to security settings and monitoring, aaPanel offers a complete toolkit for IT admins and cloud developers looking for efficient server control. Routine maintenance tasks, like cleaning up unused files and monitoring system health, are important to further enhance server performance and stability.
12 November 2024 · 6 min to read
PostgreSQL

How to Backup and Restore PostgreSQL Databases with pg_dump

PostgreSQL is a robust, open-source relational database mostly used for web applications and data storage solutions. Ensuring data recovering from unexpected losses is essential, and PostgreSQL offers powerful tools for backup and restoration. In this guide, we’ll walk through the process of backing up and restoring PostgreSQL databases using the pg_dump and pg_restore commands. Creating a Sample Database To walk through this backup and restore process with PostgreSQL, let’s first create a sample database called shop_inventory, populate it with some tables and data, and then demonstrate the pg_dump and pg_restore commands in real-world scenarios. If PostgreSQL is not installed, you can do it with: sudo apt install postgresql -y After the installation is complete, switch to the postgres user: sudo -i -u postgres Then, start by connecting to PostgreSQL: psql -U postgres Inside the PostgreSQL prompt, create the shop_inventory database: CREATE DATABASE shop_inventory; Generate Tables and Insert Sample Records Establish a connection to the shop_inventory database: \c shop_inventory; Then create the tables: customers, products, and orders. CREATE TABLE customers ( customer_id SERIAL PRIMARY KEY, name VARCHAR(100), email VARCHAR(100) ); CREATE TABLE products ( product_id SERIAL PRIMARY KEY, name VARCHAR(100), price NUMERIC(10, 2) ); CREATE TABLE orders ( order_id SERIAL PRIMARY KEY, customer_id INT REFERENCES customers(customer_id), product_id INT REFERENCES products(product_id), quantity INT, order_date TIMESTAMP DEFAULT CURRENT_TIMESTAMP ); Populate these tables with sample data: INSERT INTO customers (name, email) VALUES ('Alice Johnson', '[email protected]'), ('Bob Smith', '[email protected]'); INSERT INTO products (name, price) VALUES ('Laptop', 1200.00), ('Smartphone', 800.00); INSERT INTO orders (customer_id, product_id, quantity) VALUES (1, 1, 2), (2, 2, 1); Now that we have our shop_inventory database set up, we’re ready to back up and restore it. Backup a Single PostgreSQL Database The pg_dump command enables you to create backups in various formats, which can be restored using pg_restore or psql. The following examples demonstrate backing up our shop_inventory database using different options. pg_dump -U [username] -d [database_name] -f /path/to/backup_file.sql For shop_inventory database: mkdir backups &&pg_dump -U postgres -d shop_inventory -F c -f backups/shop_inventory_backup.custom -F c specifies the format of the backup. -F stands for "format," and c denotes "custom format." The custom format is specific to PostgreSQL and creates a compressed, non-textual backup file. This format is useful for selective restoration because it allows pg_restore to restore individual tables or objects from the backup. This command creates a PostgreSQL file containing the structure and data of the shop_inventory database. Full Databases Backup (Full Instance Backup) The pg_dumpall command can back up all databases, roles, and configurations in a single file. pg_dumpall -U [username] -f /path/to/all_databases_backup.sql Example: pg_dumpall -U postgres -f backups/full_postgres_backup.sql This creates a file in SQL format that includes all databases, allowing you to restore the entire PostgreSQL setup. Backup a Remote PostgreSQL Database To back up a database hosted on a remote server, use the -h option with pg_dump to specify the host. pg_dump -U [username] -h [host] -d [database_name] -f /path/to/backup_file.sql Example for shop_inventory on a remote server: pg_dump -U postgres -h remote_host -d shop_inventory -f backups/remote_shop_inventory_backup.sql Make sure the remote server allows connections and that the user has sufficient privileges. Restore an Individual PostgreSQL Database To restore a backup, it’s often necessary to drop the existing tables to avoid conflicts, especially if the table structures or data have changed. Here’s a guide on how to drop tables in shop_inventory and then restore them from a backup. You can drop all tables in shop_inventory either manually or with a command that removes all tables at once. This example shows how to drop all tables using a single psql command. psql -U postgres -d shop_inventory In the psql prompt, run the following command to generate a list of DROP TABLE statements and execute them: DO $$ DECLARE r RECORD; BEGIN FOR r IN (SELECT tablename FROM pg_tables WHERE schemaname = 'public') LOOP EXECUTE 'DROP TABLE IF EXISTS ' || quote_ident(r.tablename) || ' CASCADE'; END LOOP; END $$; This block drops each table in the public schema, along with any dependencies. Exit the psql prompt by typing: \q Now that the tables have been dropped, you can restore the shop_inventory database from your backup file. Execute pg_restore to restore the database. Ensure that your backup was created with pg_dump using the -F c (custom) or -F t (tar) option. pg_restore -U [username] -d [database_name] -1 /path/to/backup_file Example: pg_restore -U postgres -d shop_inventory -1 backups/shop_inventory_backup.custom -1 executes the restore in a single transaction, which is helpful for rollback in case of an error. The pg_restore command is employed to restore non-SQL format backups (e.g., custom or .tar format). pg_restore -U [username] -d [database_name] -1 /path/to/backup_file Restore All PostgreSQL Databases For a full restore, you usually work with a backup created by pg_dumpall, which includes all databases, roles, and configurations. Before performing a full restore, you might want to drop and recreate all existing databases to avoid conflicts. For our example, let’s drop the database shop_inventory then restore it: psql -U postgresDROP DATABASE shop_inventory If you backed up all databases with pg_dumpall, use psql to restore: psql -U postgres -f backups/full_postgres_backup.sql This command restores every database, role, and configuration as they were at the time of the backup. Restore a PostgreSQL Database from a Remote Server To restore a backup to a remote server, use the -h option with pg_restore or psql. pg_restore -U [username] -h [host] -d [database_name] -1 /path/to/backup_file For SQL files, use psql: psql -U [username] -h [host] -d [database_name] -f /path/to/backup_file.sql Make sure that network permissions and user access are configured correctly for the remote server. Conclusion By following these commands, you can back up and restore a PostgreSQL database like shop_inventory, ensuring data safety for your applications. Regular backups are vital, and testing your restore process is equally important to minimize downtime and data loss. With these tools, you can confidently manage PostgreSQL data in any scenario. Hostman provides pre-configured and ready-to-use cloud databases, including cloud PostgreSQL.
12 November 2024 · 6 min to read
Apache

How to Install Apache on CentOS

The Apache web server is the most widely used platform for deploying HTTP-based services. Its popularity is due to its support for dynamically loadable modules, compatibility with various file formats, and integration with other software tools. Prerequisites To install the Apache HTTP server following this guide, you will need: A local computer or a cloud server with CentOS 9 installed A user with sudo privileges or root Enabled firewalld Step 1: Install Apache The Apache package is available in the official CentOS repository, so you can install it using dnf. First, update the package list: sudo dnf update -y Run the following command to install Apache: sudo dnf install httpd -y The package manager will install the Apache web server and all necessary dependencies on CentOS. Step 2: Configuring the Firewall To operate the web server, you’ll need to configure the firewall to allow HTTP and HTTPS traffic: sudo firewall-cmd --permanent --add-service=httpsudo firewall-cmd --permanent --add-service=https After running these commands, restart the firewall to apply the new rules: sudo firewall-cmd --reload The Apache installation is now complete, and you can start the web server and check its functionality. Step 3: Checking the HTTP Server Once installed, Apache isn’t running yet, so you need to enable and start it using these commands: sudo systemctl enable httpdsudo systemctl start httpd To verify if the Apache service has started, use this command: sudo systemctl status httpd If the web server is running correctly, you should see a message showing the status as active (running): ● httpd.service - The Apache HTTP Server     Loaded: loaded (/usr/lib/systemd/system/httpd.service; enabled; preset: disabled)     Active: active (running) since Thu 2024-11-07 07:34:27 GMT; 6s ago Another way to check is to open the server’s IP address in a browser: http://your_server_ip You can find your server’s IP on the server's Dashboard or in an email received after setting up the server. Step 4: Managing the Apache Service Now, you can try some systemctl commands for interacting with the Apache service.  For example, to stop the HTTP server, use: sudo systemctl stop httpd To start it again, use: sudo systemctl start httpd For a complete restart, such as when applying configuration changes: sudo systemctl restart httpd To reload Apache without interrupting active connections, use: sudo systemctl reload httpd We enabled Apache to start automatically when the server boots. If you prefer to disable this option, run: sudo systemctl disable httpd These commands allow you to manage the Apache process easily. Step 5: Setting Up Virtual Hosts The default Apache HTTP server configuration allows for hosting only one site. However, you can set up virtual hosts to host multiple sites with separate resources. Virtual hosts in Apache work similarly to those in Nginx. They allow you to separate configurations and host multiple domains on a single virtual or physical server. In this guide, we’ll use a placeholder site called example.com. When configuring, replace it with your actual domain. Create the html directory for example.com: sudo mkdir -p /var/www/example.com/html Create a directory for log files: sudo mkdir -p /var/www/example.com/log Set permissions for the html directory. Assign ownership to the $USER environment variable. sudo chown -R $USER:$USER /var/www/example.com/html Verify standard permissions for the root directory: sudo chmod -R 755 /var/www Create an index.html file. You can use any code editor to create this file. For example, with vi: sudo vi /var/www/example.com/html/index.html Add simple content to the file: <html> <head> <title>Welcome to Example.com!</title> </head> <body> <h1>Success! The example.com virtual host is working!</h1> </body> </html> After saving index.html, you’re nearly ready to set up the configuration files for each domain. These files will tell Apache how to handle requests for each virtual host. Create directories for virtual host configurations. The configuration files for individual domains are stored in a sites-available directory, while the sites-enabled directory will contain symbolic links to sites that are ready to receive traffic: sudo mkdir /etc/httpd/sites-available /etc/httpd/sites-enabled Now, you need to instruct the HTTP server to find virtual hosts in the sites-enabled directory. To do this, modify the main Apache configuration file by running the following command: sudo vi /etc/httpd/conf/httpd.conf Then, move the cursor to the very end of the file and add the following lines: # Supplemental configuration # # Load config files in the "/etc/httpd/conf.d" directory, if any. IncludeOptional conf.d/*.conf IncludeOptional sites-enabled/*.conf Now, it’s time to create the virtual host configuration file: sudo vi /etc/httpd/sites-available/example.com.conf In this file, add the following configuration: <VirtualHost *:80> ServerName www.example.com ServerAlias example.com DocumentRoot /var/www/example.com/html ErrorLog /var/www/example.com/log/error.log CustomLog /var/www/example.com/log/requests.log combined </VirtualHost> Make sure to replace example.com with your actual domain name. This configuration tells the web server where to find the site’s root directory and where to store the error and access logs. After saving and closing the file, you need to activate the virtual host by creating a symbolic link for the domain in the sites-enabled directory: sudo ln -s /etc/httpd/sites-available/example.com.conf /etc/httpd/sites-enabled/example.com.conf At this point, the configuration is complete, and the host is ready to function. However, before restarting the web server, it’s a good idea to check if the SELinux module is correctly handling requests. Step 6: Configuring Permissions in SELinux The SELinux (Security-Enhanced Linux) module enhances the operating system's security. CentOS comes with a preconfigured SELinux package that works with Apache. However, since we've made changes, starting the web server services might result in an error. To resolve this, you need to adjust SELinux policies for Apache. There are two ways to adjust these policies: a universal approach and a folder-specific approach. Option 1: Universal Approach This method allows the SELinux security module to use any Apache processes via the httpd_unified boolean variable. It’s convenient but doesn’t allow separate policies for individual directories and files. To enable the universal policy, run: sudo setsebool -P httpd_unified 1 The setsebool command is used to modify boolean values, and the -P flag ensures that the change is persistent across reboots. In this case, the httpd_unified boolean is activated with the value 1. Option 2: Adjusting SELinux Policies for Specific Directories This approach requires more steps but allows for more granular control over permissions for each directory or file. You’ll need to specify the context type for each new folder manually. For example, to check the parameters of the /var/www/example.com/log directory, run: sudo ls -dlZ /var/www/example.com/log/ You’ll see something like this: drwxr-xr-x. 2 root root unconfined_u:object_r:httpd_sys_content_t:s0 6 Nov 07 09:01 /var/www/example.com/log/ You can see that the context used is httpd_sys_content_t, meaning Apache can only read files placed in this folder. To change the context to httpd_log_t so that the web server can write to log files, run: sudo semanage fcontext -a -t httpd_log_t "/var/www/example.com/log(/.*)?" This command will set the correct context for the log directory and its contents, allowing Apache to write log entries. Apply the changes using the following command: sudo restorecon -R -v /var/www/example.com/log The -R flag allows the command to run recursively, updating existing files, and the -v flag will display the changes being made. You should see an output like this: Relabeled /var/www/example.com/log from unconfined_u:object_r:httpd_sys_content_t:s0 to unconfined_u:object_r:httpd_log_t:s0 If you want to verify that the context type has been updated, check the current status again: sudo ls -dlZ /var/www/example.com/log/ The output should look like this: drwxr-xr-x. 2 root root unconfined_u:object_r:httpd_log_t:s0 6 Nov 07 09:01 /var/www/example.com/log/ Step 7: Testing the Virtual Host After adjusting the SELinux permissions, the Apache server should now be able to write data to the /var/www/example.com/log directory. Let’s restart the Apache service: sudo systemctl restart httpd Next, list the contents of the /var/www/example.com/log directory to verify that the system has created the log files: ls -lZ /var/www/example.com/log You should see output similar to this: -rw-r--r--. 1 root root system_u:object_r:httpd_log_t:s0 0 Nov 07 09:06 error.log-rw-r--r--. 1 root root system_u:object_r:httpd_log_t:s0 0 Nov 07 09:06 requests.log The first line confirms the existence of the error.log file, and the second confirms the presence of the requests.log file. Now, you can check the functionality of the domain through a browser. You should see a message like: Success! The example.com virtual host is working This confirms that the virtual host has been successfully set up and is serving content. Repeat steps 5 and 6 for each new site, replacing the domain with the appropriate one. Conclusion In this tutorial, we've walked through installing and configuring Apache on CentOS 9, including setting up virtual hosts for multiple domains. We covered installation with dnf, configuring firewall rules, enabling Apache to start on boot, and managing its service using systemctl. We also explored SELinux configuration for proper permissions, ensuring Apache can read and write log files. With these steps, you'll have a functional web server ready to host sites and deploy content.
11 November 2024 · 8 min to read
Code Editor

How to Format Code with Prettier in Visual Studio Code

When writing code, it’s often hard to focus on keeping it visually neat. Indentation, single vs. double quotes, and semicolons can feel insignificant when you're deep in thought about the complex logic of modern web applications. This is where the Prettier Code Formatter comes in. Prettier is a customizable code formatter that supports multiple languages and integrates with most code editors. In this article, we’ll look at how to use Prettier in Visual Studio Code. For other integrations and installation methods, refer to the Prettier documentation. Setting Up the Workspace We assume you already have Visual Studio Code installed and a code file that needs formatting. Here’s a sample snippet: const name = "Hostman"; const service ={first: name } console.log(service); const printName = (fName) => { console.log(`This is ${fName}`) } printName ('Hostman'); This code has typical issues: inconsistent quotes, missing indentation, and misplaced line breaks. If you run it, it will execute just fine since these details don’t matter to JavaScript. However, for a human reader, this code is hard to follow. What we need to do is install an extension to automatically add indentation, semicolons, and other elements that make the code more readable. Open the Extensions tab in the VS Code menu (or press Ctrl + Shift + X on Windows). Search for Prettier. This VS Code extension has over 20 million installs. Click Install to add it to your editor. There’s an alternative method. Press Ctrl + P to open the Quick Launch panel and run the following command: ext install esbenp.prettier-vscode This command will install the Prettier extension directly. Now you can use the tool for quick code formatting in VS Code. Auto-Formatting Say you get a Slack message from the project manager — the updated Hostman Cloud Server page needs to go to production urgently. Everything’s ready and working, but the code formatting is lacking, and your team won’t be thrilled about that. Luckily, you now have a VS Code extension that can fix these issues quickly and painlessly. Press Ctrl + Shift + P to open the Command Palette. Find and run the Format Document With command. Select Prettier from the dropdown list. Your code will be formatted with the necessary spaces, indentation, line breaks, and consistent quotes. Here’s an example: const name = "Hostman"; const person = { first: name }; console.log(person); const sayHelloLinting = (fName) => { console.log(`Hello linting, ${fName}`); }; sayHelloLinting("Hostman"); This tool is extremely convenient, supporting quick setup for different languages. For example, if you run auto-formatting on a Python file, you’ll be prompted to install autopep8. This utility automatically formats Python code according to PEP 8, the official Python style guide, using pycodestyle to identify areas needing formatting. Autopep8 can fix most issues flagged by pycodestyle. To avoid the need for manual formatting each time, enable auto-formatting on save in Prettier: Open Settings (on Windows, press Ctrl + ,). Use the search bar to find Editor: Format On Save. Check the box to enable formatting on save. That’s it! Now you won’t need to run formatting manually. Setting Up Custom Formatting Rules Developers can customize their formatting rules in two ways: Adjust the configuration directly in the extension’s settings. Create a separate configuration file. In the extension settings, you can change common parameters, such as the number of spaces for indentation or whether to add a semicolon at the end of each line. This approach is quick, but the configuration will only apply to your personal setup. To share the configuration with your entire development team, you should create a separate configuration file that enforces consistent formatting rules across Visual Studio Code. A .prettierrc configuration file can use extensions like .yml, .yaml, .json, .js, or .toml. Here’s a simple example in JSON format: { "trailingComma": "es5", "tabWidth": 2, "semi": true, "singleQuote": false } For other basic options, refer to the Prettier documentation. Conclusion Prettier is a tool that significantly speeds up development by automatically applying formatting rules, whether default or developer-customized. After creating a configuration file, your team will have a unified set of formatting rules. This allows everyone to work on the next task without worrying about code style. Thanks to Prettier, all those commas and indentations can be fixed in just a few clicks during the refactoring stage, letting you focus on development with peace of mind.
11 November 2024 · 4 min to read

Tailored cloud server
solutions for every need

General-purpose cloud servers for web hosting

Ideal for websites, content management systems, and basic business applications, cloud web servers provide balanced performance with reliable uptime. These servers are designed to handle moderate traffic while keeping your website or application responsive.

High-performance servers for cloud computing


For businesses needing powerful resources for tasks like AI, machine learning, or data analysis, our high-performance cloud servers are built to process large datasets efficiently. Equipped with 3.3 GHz processors and high-speed NVMe storage, they ensure smooth execution of even the most demanding applications.

Storage-optimized cloud servers for data-driven operations

Need to store and retrieve large amounts of data? Our cloud data servers offer vast capacity with superior read/write speeds. These servers are perfect for databases, large-scale backups, or big data management, ensuring fast access to your data when you need it.

Memory-Optimized Servers for Heavy Workloads


These servers are built for applications that require high memory capacity, such as in-memory databases or real-time analytics. With enhanced memory resources, they ensure smooth handling of large datasets, making them ideal for businesses with memory-intensive operations.

In-depth answers to your questions

Which operating systems are supported on your cloud servers?

Choose popular server operating systems and deploy them in one click: from Ubuntu to CentOS. Licensed operating systems are available directly in the control panel.

How can I get started with a cloud server? Is there a straightforward registration process?

Register with Hostman and choose the tariff that suits your needs and requirements. You can always add processing power and purchase additional services if needed.

You don't need a development team to start shared hosting - you'll do everything yourself in a convenient control panel. Even a person with no technical background can easily work with it.

What is the minimum and maximum resource allocation (CPU, RAM, storage) available for cloud servers?

The starter package includes a 1×1.28 GHz 1-core CPU, 1 GB RAM, 15 GB fast MVNe SSD, dedicated IP address and 200 Mbps. For demanding users, go for a powerful 8×3.3 GHz server, 16 GB RAM, 160 GB fast MVNe SSD, dedicated IP address and 200 Mbps. Alternatively, you can always get an incredibly powerful server by configuring it yourself.

What scaling options are available for cloud servers?

You can easily add power, bandwidth, and channel width with just a few clicks directly in the control panel. With Hostman, you can enhance all the important characteristics of your server with hourly billing.

How much does a cloud server cost, and what is the pricing structure like?

Add capacity, bandwidth and channel width with a few clicks right in the control panel. With Hostman, you can improve all important features of your server - with hourly billing.

Is there a trial or testing period available for cloud servers before purchasing?

Contact the friendly Hostman support team, and they will offer you comfortable conditions for test-driving our cloud server — and will transfer your current projects to the cloud for free.

What security measures and data protection are in place for cloud servers?

Cloud servers are hosted in a Tier III data center with a high level of reliability. Hostman guarantees 99.99% availability according to the SLA, with downtime not exceeding 52 minutes per year. Additionally, data is backed up for extra security, and the communication channel is protected against DDoS attacks.

What level of support is provided for cloud servers?

Hostman support is always available, 7 days a week, around the clock. We respond to phone calls within a minute and chat inquiries within 15 minutes. Your questions will always be handled by knowledgeable staff with sufficient authority and technical background.

Can I install my own software on a cloud server?

Yes, absolutely! You can deploy any software, operating systems, and images you desire on your server. Everything is ready for self-configuration.

What backup and data recovery methods are available for cloud servers?

Hostman takes care of the security of your data and backs up important information. Additionally, you can utilize the automatic backup service for extra safety and reliability.

Is there a guaranteed Service Level Agreement (SLA) for cloud server availability?

Hostman guarantees a 99.99% level of virtual server availability according to the SLA (Service Level Agreement).

Which data center locations are available for hosting cloud servers?

Our servers are located in a modern Tier III data center in the European Union and the United States.

Can I create and manage multiple cloud servers under a single account?

Certainly, you can launch multiple cloud servers and other services (such as databases) within a single account.

What is the deployment time for cloud servers after ordering?

With Hostman, you'll get a service that is easy and quick to manage on your own. New cloud servers can be launched almost instantly from the control panel, and the necessary software can be installed within minutes.

What monitoring and notification capabilities are offered for cloud servers?

Hostman specialists monitor the technical condition of servers and software around the clock. You won't have to worry about server availability — it will simply work, always.

Can I modify the specifications of my cloud server (e.g., increase RAM) after creation?

You can easily configure your server by adding resources directly in the control panel. And if you need to switch to lower-tier plans, you can rely on Hostman support — our specialists will handle everything for you.

Do you have questions,
comments, or concerns?

Our professionals are available to assist you at any moment,
whether you need help or are just unsure of where to start
Email us
Hostman's Support